There are many “inns and outs” when it comes to recording with a mixing board. I know, lame right?
Sometimes I look at my poor ole’ tiny M-box and feel sorry for it. Yes, it can do some very powerful stuff, but with only two simultaneous inputs it often gets used to only too a fraction of its potential. Yes, if you count there are three inns per channel, (one microphone or hi-z input, and two ¼ inch inputs), but only one input per channel can be used at the same time.
***As a note, it does not matter what sort of digital interface you are using, nor does it matter what recording software you might be running. This mixing blog post should apply to them all.
What about those of us that want to record more than one or two tracks worth of noise at the same time? Well, welcome to mixing “pre M-box or pre-digital interface style”.
Which mixing board are we talking about here? There seems to be a lot of different types of mixing boards out there to choose from. Now there are USB powered mixing boards, DSP included boards, automated boards with motorized faders, fire wire capable mixers, bus and group capable mixing boards, and heck; the list goes on and on.
Here is some information that I have learned about buying music gear. I am a big fan of buying music gear, but only buying it once. I have purchased a cheaper piece of gear than I needed and then later decided to sell it in the spirit of an upgrade. I would then repeat this process over and over as my need for bigger and better gear grew. This is where we loose money over and over again! Unless you have an antique Les Paul or a Strat in your attic, none of this stuff seems to hold a great re-sale value. Our new gear looses half of its worth as we carry it out of the store. I am writing from personal experience here, so please take the advice.
Buying what you need is paramount for your recording success. But buying a little more than you need might come in handy in the future. The idea here is to purchase a mixing board that meets your needs, but also may have a few extra bells and whistles that you might find useful when mixing your next project. Ask yourself “What do I really need?” before stepping into a high pressure sales floor can be important. Do you really need motorized faders, an alarm clock, coffee maker, and a garage door remote control all built in? Maybe you do, maybe you don’t, but knowing first is important. Retail clerks know exactly how to make us buy what we don’t need, time and time again.
This brings me to the first detail that I often consider when planning a recording project that might just have a need for a purchase of a mixing console. I will use an example project that demands more microphones than a simple M-box can simultaneously provide for. Then I will share with you the factors that might make up a list of needs to be met with a moderately priced mixing board.
Here is our pretend recording session.
Let’s just say that I have a drum kit set up in my home. I also have a bunch of microphones. I want to record a drum track into Pro Tools. I want to press record and then play along with a click track, recording the whole time through the collection of microphones.
Often times a drum kit requires many different mics placed all around (on top of, underneath, away from, and inside of it) to get a great sound. Getting each mic to represent exactly what we hear, both in terms of volume and in quality of EQ is critical, as you drummers already know.
Our new mixing board should allow us to monitor, or solo, each one of these microphones. Most supply a headphone jack or a monitor out jack for this purpose. This option is a must because we will want to apply some EQ and some effects to our drum kit. Then we will want to set each microphone’s overall volume to match the rest of the mics that will make up our mix.
It boils down to coming up with a way to “pre-mix” all of these microphones down to one stereo-pair of “outputs” (or maybe down to a pair of mono outputs) all before heading out to the digital interface.
Deciding on just how many mics you plan on using for this recording session is a major factor in determining which board might be the right fit. Finding a mixing board that allows for this very amount of inputs (or maybe supplies a tad bit more) will be important. We are not done yet, so don’t purchase it on just this factor!
The next determining factor on the list is onboard effects. Many boards now offer digital sound processors (DSP’s) built right in. DSP’s on mixing boards can offer you effects like compressors, reverbs, and delays; just to name just a few, so make sure that you find just what you need. Asking a sales person weather or not you can try or in-store demo a board out will get you closer to figuring out if you like the sounds of the effects themselves or not.
You might think about how you wish to apply these effects also, and if the board you are looking at (listening to) will work with your plan of attack. Are you wanting to apply a room reverb to the entire mix, or maybe to just the snare? Do you desire to compress the kick while putting a second effect (like a short delay) on top of it at the same time? Can the mixing board apply more than one effect at the same time? These are important questions for sure. Double checking never hurts.
Maybe you have a great sounding outboard effects unit already, and you want to add that certain effect to your drums. If this is the case then your mixing board will need to have an effects send and return loop built in. This feature may be advertised as a “bus send and return”, so make sure that you will be able to send and return your tracks to an effects unit in the way that you want to.
Bussing or grouping tracks is something different, but let’s get that figured out since I just brought it up. Mixing boards can come with a lot of different options. One option is bussing (or grouping) tracks into a sub-mix. Bussing tracks lets you send as many tracks as you wish to one track, or one stereo pair of tracks. Bussed or grouped tracks allow a person to closely adjust and set the levels of many different tracks, and then send the “pre-mixed” group to one or two tracks. Now their levels can be turned up or down with the ease of just one or two sliders, instead of moving an array of sliders either up or down each time you hear the need. The beauty is that these “sub mixed” tracks will remain perfectly in volume relationship with one another. They were fine tuned against each other first, and then they were set. From that point on only the “bussed or grouped volume” should be changed up or down.
Drums are the most often bussed or grouped instruments. Back up vocals are right behind drums on the list. A lot of touring bands use mixing consoles that have this feature. This allows the mixing engineers to “set it and forget it”.
If you think about this buss and/or group mixing concept, you will see that it is just like what we are doing with our drum kit and the microphones. We sub-mix or pre-mix the different levels first, and then send them to the digital interface. If our digital interface was a mixer instead then we would be buss mixing, or group mixing. Do you need this option in our case? No, we don’t, but now you understand what this option is for and what it does for us.
Powered mixers are mixers that supply high output to the outs, or “the mains”. These are used mostly by “gigging” bands, perhaps some spoken word shows, and most acoustic performances. These mixers are designed to go directly to speakers, and are not what we are looking for here. These do mix many tracks down to a stereo signal, and each track can certainly be heard, but rather loudly.
Well all that is left is to recommend some mixing boards….. Without knowing what you are mixing, and what options you might need, I can only get you close.
Here are some of the more popular mini mixers that wont set you back too far.…
Alesis Multi mix 8 , Mackie 1604 VLZ PRO , Peavey PV14
Behringer “Xenyx” , Tapco , Yamaha ,
Yamaha MG166CX USB
I really do hope you found this informative. Please take just a second and tell a friend about this blog. If you have not subscribed yet, now is the time. I don’t want you getting lost and then missing out on any of the upcoming posts! Comments are always welcome!

Tuesday, May 26, 2009
Friday, May 22, 2009
Recording Weekly blog notes….
I have pulled the quantization tracks from the related “quantization post”, down from the web, just incase you are wondering where they went. They have served their purpose, so out with the old! Housekeeping I suppose!
For those of you not that familiar with Worlds Best Producers, it is a great place for the home recording musicians to meet other recording enthusiasts, and a great place to pull ideas from. Other participants can listen to your music and then rate it. They will ask for you to return the favor, which is half the fun of this site. There is a constant tally of votes kept by the site, and the votes are for producer of the month and year. You can either cast a vote for, or get votes from others, for producer of the month and of the year. Cash and merchandise prizes are rewarded to the winners!
I have just updated my site at Worlds Best Producers. I have re-written some classics and supplied brand new tracks to the site. Feel free to listen, and then leave me a note.
Secondly, if you are not yet familiar with the indie music scenes’ download laden website, titled Forte, then it should be next on your “must go to” list. Forte is where indie musicians can meet and greet one another, plus sell or purchase their own music.
Free downloads are available on Forte too, so make sure you spend some quality time searching your favorite type of music genre. Uploading your own music is simple, and you are able to keep track of your visitors as well as the downloading of your own cuts. Free membership is available.
I also have a song writing page on Forte, and if you would like to check it out, than here is the link to it. Thanks for listening, by the way!
Keep on writing and singing! Feel free to post your own comments here for all to see.
Thursday, May 21, 2009
Midi basics with Pro Tools
Before I start in on this blog post, let me first make a few suggestions. Midi can quickly become very confusing. I have purchased a few great books on this topic, and these books made my life writing and recording with midi much simpler. These informative books show how to implement midi, step by step, into your DAW song writing process. This is not a sales pitch, but instead some serious help for you, if you feel that you may need it.
The books that I had listed here, prior, have been moved to the right hand side, under "Books that you should own". This should be a faster way of checking them out.
Now, on with the blog…
As recording enthusiasts, we often times end up using midi and the related midi data for instrumentation in our songwriting.
But what exactly is midi, and how do we use it?
For starters, M.I.D.I. stands for Musical Instrument Digital Interface, and to be blunt it is a language all of its own. Your midi capable synths, software based “virtual” plug-ins, stand alone midi sound modules, and all of the types of virtual midi instruments all use this language (midi) to talk with one another. It is like a digital midi piano synth introducing itself to your midi sound module, and then both units agreeing to work together. They just speak midi to one another instead of, say, English.
Midi is not to be confused with sound that gets recorded, but instead it is like a bunch of “on and/or off commands” that trigger midi sounds from midi devices. You can have more than one midi device hooked up at a time, and all of them playing along, in time, with your music. A drum sequencer, a midi piano, and a midi bass sample module all playing together is a good example.
Writing with midi is much like using music notation; in that a notes' value is entered onto a "piano roll" time sheet. Your digital audio workstation (D.A.W.), like Pro Tools and/or Cakewalk, is "midi capable", and it has a section devoted to midi sequencing or “writing with midi”. As the D.A.W. playback of your song that contains midi information occurs, general midi controllers recognize the “on and/or off commands” and triggers the midi devices to make the appropriate sounds.
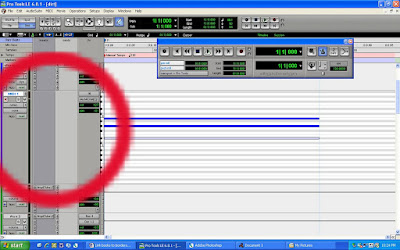
Image of A midi track in Pro Tools.
There are all sorts of midi triggering devices. Midi triggers can be used to write midi information, instead of using your midi "piano roll" type of sequencer in your D.A.W. Midi keyboard controllers (digital piano keyboards), special midi guitars, midi saxophones, and even midi drum kits can all trigger midi information. Keep in mind that these instruments do not make sounds, but instead trigger a midi impulse to a midi sound module, which sounds the sample on cue. Using midi instruments is just a more natural way to write midi information, and it may be the fastest way to write midi information into your music.
You must tell each midi instrument and midi sound module just exactly what other midi devices are currently hooked up to one another. By simply plugging in a midi chord to each “midi in” and “midi out” jack, you will be hooking up the midi communication lines between the digital midi devices.
You must also designate one device to be in charge of the others, or in control. This midi device is known as the controller, which is often times the recording software itself or your DAW. All of the other midi units become “slaves” to the controller. Use the “midi out” from the main/control unit, to the “midi in” of the slave device, and then the slaves’ “midi out” returns to the main/controller units “midi in”. This is a series loop, or a closed loop pattern.
A midi interface is often needed to run a midi system. A midi interface is simply a central midi brain that relates time based information as well as the sampled sounds from the main midi controller to all of the other midi units that may be playing along.
Just to break it down a different way, midi information is just triggered “on and off” commands. These commands are recorded, or written, into your D.A.W. software. When this midi information is played back the midi data is sent out to the midi sound modules in your midi chain, and the sound enters back into the host D.A.W. You will need both the “recorded”, or written, midi notes and the midi sound modules to take part in this process. One must work with the other, and no unit in this sort of midi chain will work by itself.
Midi sends and receives information through 16 different channels. Each channel is reserved for a particular sound. This can be confusing, so let’s try to keep it simple for sake of this post. If you are like me, you use Reason software for your entire midi recording needs. This is great because I don’t have to create midi tracks in Pro Tools, but instead, I write midi using Reason. It is basically the same thing, just in a different place. Let me explain…..
Using Reason software, by Propellarhead, you can write midi information on piano roll-style notation. Let’s say we decide to write midi information using the Reason “Redrum” synth. The midi data, in turn, goes to the Reason sound library when triggered, and finds the drum sample that you have chosen. This is simple and very effective. I can audition the sounds found in the Reason sound banks using a midi digital piano keyboard that I have plugged into the midi ports of my Pro Tools system. Reason is a software-based midi sound library, rather than a stand alone midi sound device.
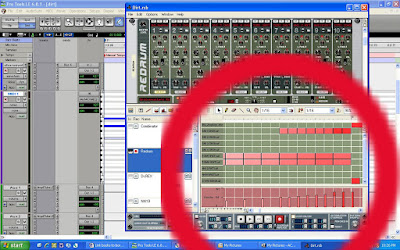
Image of a midi sequence written with Reason software.
Another way of thinking about working with midi would be a little more complex, but it would work much the same way. In this case I would trigger a midi impulse, using a software bases D.A.W. (like Pro Tools) to trigger a sound found in an external midi sound module. The sampled sound would then return to my Pro Tools system via the midi routing, or the chord patches of midi “ins” and “outs”. Same thing is happening, only from different devices.
The books that I had listed here, prior, have been moved to the right hand side, under "Books that you should own". This should be a faster way of checking them out.
Now, on with the blog…
As recording enthusiasts, we often times end up using midi and the related midi data for instrumentation in our songwriting.
But what exactly is midi, and how do we use it?
For starters, M.I.D.I. stands for Musical Instrument Digital Interface, and to be blunt it is a language all of its own. Your midi capable synths, software based “virtual” plug-ins, stand alone midi sound modules, and all of the types of virtual midi instruments all use this language (midi) to talk with one another. It is like a digital midi piano synth introducing itself to your midi sound module, and then both units agreeing to work together. They just speak midi to one another instead of, say, English.
Midi is not to be confused with sound that gets recorded, but instead it is like a bunch of “on and/or off commands” that trigger midi sounds from midi devices. You can have more than one midi device hooked up at a time, and all of them playing along, in time, with your music. A drum sequencer, a midi piano, and a midi bass sample module all playing together is a good example.
Writing with midi is much like using music notation; in that a notes' value is entered onto a "piano roll" time sheet. Your digital audio workstation (D.A.W.), like Pro Tools and/or Cakewalk, is "midi capable", and it has a section devoted to midi sequencing or “writing with midi”. As the D.A.W. playback of your song that contains midi information occurs, general midi controllers recognize the “on and/or off commands” and triggers the midi devices to make the appropriate sounds.
Image of A midi track in Pro Tools.
There are all sorts of midi triggering devices. Midi triggers can be used to write midi information, instead of using your midi "piano roll" type of sequencer in your D.A.W. Midi keyboard controllers (digital piano keyboards), special midi guitars, midi saxophones, and even midi drum kits can all trigger midi information. Keep in mind that these instruments do not make sounds, but instead trigger a midi impulse to a midi sound module, which sounds the sample on cue. Using midi instruments is just a more natural way to write midi information, and it may be the fastest way to write midi information into your music.
You must tell each midi instrument and midi sound module just exactly what other midi devices are currently hooked up to one another. By simply plugging in a midi chord to each “midi in” and “midi out” jack, you will be hooking up the midi communication lines between the digital midi devices.
You must also designate one device to be in charge of the others, or in control. This midi device is known as the controller, which is often times the recording software itself or your DAW. All of the other midi units become “slaves” to the controller. Use the “midi out” from the main/control unit, to the “midi in” of the slave device, and then the slaves’ “midi out” returns to the main/controller units “midi in”. This is a series loop, or a closed loop pattern.
A midi interface is often needed to run a midi system. A midi interface is simply a central midi brain that relates time based information as well as the sampled sounds from the main midi controller to all of the other midi units that may be playing along.
Just to break it down a different way, midi information is just triggered “on and off” commands. These commands are recorded, or written, into your D.A.W. software. When this midi information is played back the midi data is sent out to the midi sound modules in your midi chain, and the sound enters back into the host D.A.W. You will need both the “recorded”, or written, midi notes and the midi sound modules to take part in this process. One must work with the other, and no unit in this sort of midi chain will work by itself.
Midi sends and receives information through 16 different channels. Each channel is reserved for a particular sound. This can be confusing, so let’s try to keep it simple for sake of this post. If you are like me, you use Reason software for your entire midi recording needs. This is great because I don’t have to create midi tracks in Pro Tools, but instead, I write midi using Reason. It is basically the same thing, just in a different place. Let me explain…..
Using Reason software, by Propellarhead, you can write midi information on piano roll-style notation. Let’s say we decide to write midi information using the Reason “Redrum” synth. The midi data, in turn, goes to the Reason sound library when triggered, and finds the drum sample that you have chosen. This is simple and very effective. I can audition the sounds found in the Reason sound banks using a midi digital piano keyboard that I have plugged into the midi ports of my Pro Tools system. Reason is a software-based midi sound library, rather than a stand alone midi sound device.
Image of a midi sequence written with Reason software.
Another way of thinking about working with midi would be a little more complex, but it would work much the same way. In this case I would trigger a midi impulse, using a software bases D.A.W. (like Pro Tools) to trigger a sound found in an external midi sound module. The sampled sound would then return to my Pro Tools system via the midi routing, or the chord patches of midi “ins” and “outs”. Same thing is happening, only from different devices.
Friday, May 15, 2009
New Paul Reed Smith acoustic guitars debut, the Tonare Grande and the Angelus cutaway.
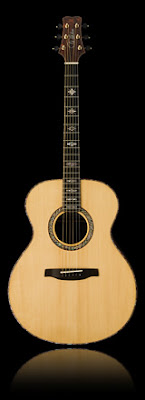

Finally unveiled at the January 2009 NAMM show, P.R.S. has added their take of what a high quality acoustic guitar should be to the list.
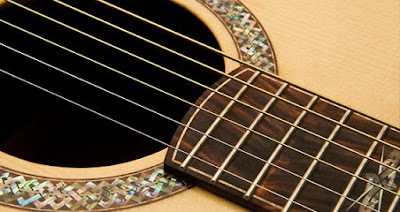
The headstocks of both of the PRS acoustic guitars have a close resemblance to the well known headstock and “bird logos” on the neck of the more popular PRS solid body electric guitars, and that is where the resemblance stops.
The standard models of the Tonare Grande and the Angelus Cutaway have a much simpler inlay and sport wooden binding, but both of these guitars can be extensively customized with Celtic cross inlays on the fret board and different tonal woods for the back, sides, and top.
These “up scaled” woods and finishes include cocobolo wood used for the guitar's back, sides, and fret board, and Adirondack Spruce for the all important, sound vibrating top. Other construction features are a Mahogany neck with a cocobolo fret board on a truss rod-less design. Instead of a truss rod, these ‘butes feature carbon fiber in the necks’ construction, which was introduced for its strength! Nice touch.
These are not Grandpas “camp guitars”, and with each one costing between 5,000 to 8,000 dollars (new), I wouldn’t expect to find one being played around the fire at your local campsite either.
The retail price goes up according to any of the extra options that you might wish to splurge on. These guitars are aimed at the serious acoustic guitar player. With the high price comes high durability, rich thick and deep tone, and years and years of pure musical enjoyment.
I have found some great videos online that show these two guitars in better depth, and being played. The first one is Martin Simpson, and can be found here.
Next up, is Tony McManus, and his video can be watched here.
The “Acoustic guitar” site has posted a great review featuring the Tonare Grande, and it can be viewed here.
For more information and “tech specs” please refer to the P.R.S. site links below for each of the two guitars….
Tonare Grande The Angelus Cutaway
If one thing can be said about these two guitars, their quality is superior. PRS knows a thing or two about making fine guitars.
A very special Paul Reed Smith story for you….
As a “shout-out” to one of my inspirations, Johnny Highland, I would like to leave you all with this: From a small town in the deep woods of Maine, Johnny Highland would one day hit the big time. Years upon years of practice pays off, and here is someone that we all wanted to see get what fame was coming to him.
He has been recorded by a ton of major labels, for everyone that is on the radio. Johnny Highland has his own P.R.S. endorsement, the Johnny Highland model guitar by P.R.S. I believe that the Johnny Highland model guitar is the only solid body with a maple neck available from P.R.S. guitars.
Steve Vai signed him to his own label by chance as he left a demo snippet on Steve Vais’ answering machine! Pure “old school wit”!
I felt the same shock as Steve Vai must have felt the first time I heard him play at a local pub in Maine, before all of the fame came. This cat is cool too! He was very polite, and shook my hand as I gave him some compliment that he’d probably heard ten million times before.
Check out Johnny Highlands’ own site and read his inspiring story by following the link.
You should take a moment and read his words found at the bottom of his page. Determination and fate prevailed. Bravo!
Feel free to subscribe to "Recording Weekly" and/or post any comments that you may have! I love hearing from all of you!
Wednesday, May 13, 2009
Distorting the truth.
Ever spend all day working on a certain track, trying to make it have some depth and emotion but end up getting only frustrated? It happens to the best of us.
What can we do in order to make a track, that we are composing, sound better or stand out in our songs? What about amping up a thin sounding vocal? How about fixing up a bass track that just will not cut through the mix? Here is one idea that you can try to almost any type of instrumental or vocal track.
Adding some beef to your mixes.
Running an instrument through a distortion effect (weather it be a distortion pedal or a software based distortion) can give it the separation and “the balls” that it needs to cut through any mix, no matter how muddy or how cloudy it may be.
But how do we know how much distortion to add, how to add it, or even what type of distortion to use?
The easy answer is trying it out for your self. I say this because I do not know what sort of song you are writing, or what sort of track you are adding distortion to. The idea is to read this post, and then play around with these ideas that I freely give to you all, on your own. Don’t be afraid to play with the dials, switches, and buttons on the distortion unit just to see what sort of unique sound you can come up with.
Please don’t limit yourself to adding a distortion to just a bass or a vocal track either. Adding a touch of distortion on even a quick snare fill can be “sound polish” for your demo. It can bring a tracks data to the very front of a mix and it can make all the difference.
Using automation when putting some distortion on a drum roll or fill can be the way to go. Using automation in this manner can allow for a more precise setting amount, and will make mixing down the tracks easier too.
Recently I had a problem. I had written what I thought was a good bass line for a song, but it sounded flat against a powerful guitar riff. In order to get it to stand apart from the mix I tried delays of varying lengths, reverbs, compressors, and even an EQ tweaking, but it all failed. I figured that I might have to clear the track and then start all over with a new amp and bass combination. Then I had another idea.
I simply added a tad of distortion to the bass, and whammo! The bass suddenly came to the front of the mix, and yet it still sat in the song nicely. I only had to make sure that the distortion was small in size and different than the distortion that the guitars were using. Suddenly the bass line sounded like a funky vibe that made the whole cut much more interesting.
But how do we apply distortion to bass guitars and other tracks in our mixes?
There are many ways to use distortion in order to achieve better mixes and I will explain only a few. Why only a few? You are just as creative as I am! I will get you started in the right direction, but you must use it to your own tastes.
The first method that I often use in order to add distortion to a track is by simply putting distortion directly “in line” with the signal path. This means running the instruments out put directly into a distortion unit and then running the output of the distortion unit back into the track.
This may be the easiest way, but it also may be the most destructive way of adding an effect like distortion. What I mean by this is that you may not be able to adjust the level of the distortion, once its recorded, and bringing out more or less of the original tracks data (without the distortion) will be impossible.
Sending the distortion to a track using an effects loop is perhaps a better way, and for a couple of reasons. First of all, you can adjust the level of the distortion being added to the track at any moment in time. Secondly you can add or subtract the overall amount of the original tracks data back into the mix. You know how much I love using effect send/return loops, so I will stop repeating myself. Well, almost….
Sometimes a mix can benefit from using a buss distortion. This is a distortion that is added as a send return loop, to any amount of the tracks that you want it on, and to one level or another. You might have heard of bus compression, and, well, it is the same principal. Once again only a certain amount of the distortion comes through the mix as you can adjust the levels of send and return for each track. Try it, you might like it!
Bottom line is that you should give using a distortion unit more play time in your overall mixes. You can use it to bring a thin vocal to the front, a bass ride fatter in a mix, or all of the above!
Please feel free to comment as you like with any suggestions or questions. Also, please feel free to put your email into the subscribe box so that you never miss a trick!
Monday, May 11, 2009
Reason to the recording rescue.
If you are like me you want to record your music in the fastest and the best sounding ways possible. With much warm welcome, let me introduce Reason Record! The link is to a great video that will make you laugh and make you want to purchase this. Unfortunately you will have to wait until September. There is a beta version available, however, if you must play now.
What’s awesome here (at only first glance) is that Reason has included both a Line 6 POD guitar unit and a POD bass unit in the Record package!
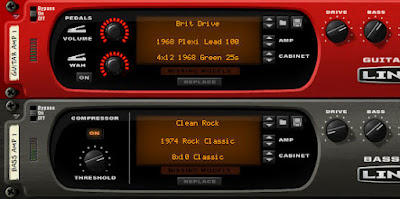
Add to that some pianos and drums along with a mixer that boasts a buss compression and you are making world class music at home!

Expected cost is 299 U.S. dollars, 149 if you currently run and own a version of Reason, and a compiled package that includes both a current version of Reason with Record too, at 629 U.S. dollars. This may sound steep, but it is not. This is one heck of a powerful package! The guitar and bass simulators alone are that expensive. I am giddy.
Monday, May 4, 2009
Using Midi Quantization
Definition
Quantization works with a couple of parameters that you set it to. You can set it to quantize to any sort of note. It then uses that notes’ speed as a guide to add the quantization, almost like a frequency setting. You can find the setting that works for your song by looking at the notes in the song itself. What notes are used with the hi-hat? Things like that can help you dial in the quantization, and don’t be afraid to try different settings.
I found this definition for quantization on the internet. This is included for the right brained among you all. Needless to say it does nothing for me, but here it is.
“Quantization refers to the process of approximating the continuous set of values in the image data with a finite (preferably small) set of values. The input to a quantizer is the original data, and the output is always one among a finite number of levels. The quantizer is a function whose set of output values are discrete, and usually finite. Obviously, this is a process of approximation, and a good quantizer is one which represents the original signal with minimum loss or distortion.”
If that sounds like French to you, then here it is in blog format.
What is quantization good for?
When we record our midi as we would record a performance, or record on the fly, often times some notes will be off. Selecting all of the midi notes from a performance, and quantizing them, will put the off timed notes where they should be. This can save us all time by not having to enter each midi note in by hand.
But what is quantization, and how does it work?
Quantization simply is the way in which we can take a bunch of midi notes that are all perhaps off time a little, and put them right on the grid, or "right in time". I use quantization in two different ways.
The first way is as I play (and record) the parts live, using a midi keyboard. After I have finished the section, I select all of the midi notes and then use quantization to correct any fast or slow notes. You only need to make sure that you are set u for the correct quantizatioe. If you are writting a quater note series, then make sure to quantize to quater notes.
The second way that I use quantization is as I use step record to enter in my midi information.
Step recording is simple enough to use, and it can make up some time also. Step recording is simply the entering midi notes one at a time, but the sequencer advances the cursor for you using the note values that you have selected.
If I had a bass line that consisted of a few bars of quater notes, in a series, that I might step record. I would make sure to set up the step record feature to advance by quater notes, leaving only the note (in octave) to enter. Each time that I play a note, the sequencer advances by one quater note, and then records the next note that I enter.
But how does one work with quantization?
I like using Reason software, and I use it to write a lot of my drum lines and bass parts. Using a midi keyboard I perfer to play the parts. I learned to use midi by entering each note one by one, but now I like to play them. After I am done with a certain part, I select the written notes, and quantize them. My whole writing process is sped up considerably.
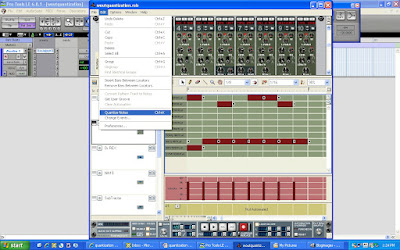
Quantization in Reason is applied by first highlighting the parts that you wish to quantize, and then selecting “quantization” which is found under the “edit” tab.
Quantization works with a couple of parameters that you set it to. You can set it to quantize to any sort of note. It then uses that notes’ speed as a guide to add the quantization, almost like a frequency setting. You can find the setting that works for your song by looking at the notes in the song itself. What notes are used with the hi-hat? Things like that can help you dial in the quantization, and don’t be afraid to try different settings.
Subscribe to:
Posts (Atom)