Tuesday, July 27, 2010

SFX Machine PRO demo.


SFX Machine PRO, from THE SOUND GUY (in CA), is a VST or RTAS plugin effect for Mac's and PC's running Windows.

To say that SFX Machine PRO is just another effect plugin (in a world crammed full of effect plugins) would simply be misleading. SFX Machine PRO is a wonderful collection of effects, complete with tweak-able presets (over 300 presets), all built into one easy to use interface.


After downloading SFX Machine PRO (in seconds flat) from the SFX Machine PRO site, SFX Machine PRO was up and running on my PC, with Pro Tools LE 8, flawlessly.

I was then overwhelmed by just how much this plugin brings to the table! Had my audio been lacking “polish” all this time? After just a few minutes of playing with SFX Machine PRO it was clear that my music had in fact been lacking some professional touches, and yes, all this time. In fact, I found myself adding SFX Machine PRO effects to all sorts of written music parts. Who knew a flanger on a drum roll intro would sound so darn professional? I know now.

SFX Machine PRO contains all sorts of professional sounding effects, all of which are easily adjustable in the SFX Machine PRO interface.

In particular I found that tweaking the effect levels is very easy, and getting the “wet to dry levels” set was a very simple, yet precise task. This is due to “wet signal amount” sliders as well as “dry signal amount” sliders provided for you in most of the included presets! Nice job!

I like really like this feature due to the ways that I like to use my effect plugins. What I mean by that is that I use effect plug ins in either one of two ways. First, in the audio track itself (series), and secondly, in an effect send and return loop (or in parallel). With the series type, the two separate “wet/dry signal-to-effect amount” sliders in SFX Machine PRO make dialing in the effect level amount a snap. In a parallel setting (as well as having effect loop send/return levels) having the extra sliders in SFX Machine PRO makes for precise “dialing in” of that perfect amount of effect! Very well done!

SFX Machine PRO also has faders for certain types of common effect levels, right inside most of the presets as well. You do not get to see the actual settings of the effects (such as certain compressor and limiter thresholds, attack, release, ect) but this makes the learning curve for SFX Machine PRO a straight line. That is more than a fair deal to me. SFX Machine PRO is a “plug in and then use” type of powerhouse effects unit.

From what I have already learned about SFX Machine PRO (from just a couple of weeks of playing with it), it adds that “sparkle” or that “polish” to my audio that was missing all along. This is true, even though I didn't know it was missing! This can't be said for many other plugins. SFX Machine PRO makes all types of tracks just sound better. I can't stress to you just how much I found out about how my tracks could simply get better and more professional sounding, just by simply applying SFX Machine PRO.

I have fallen in love with the slap back delays, reverbs, and the flange effect presets found inside SFX Machine PRO. But the effect list does not stop there. Included in the effect list are high and low pass filters, de-essers, gates,panning and stereo sims, choruses, envelope filters, and pitch tools; and this is just to start a list. Most of the supplied presets sound just fine with no alteration what-so-ever, but then again some needed a little modest tweaking just to sit better in my tracks. That is due to the certain genre of music that I was putting it on, as well as the types of tracks themselves.

I have now changed the way I record at home. I have added another step to my recording work flow. After getting my tracks to sound as near-to-perfect as I know how to, I will from now on run the tracks through SFX Machine PRO just to see what may be missing!

Some of the effects that hit me (in a good way) were the “record presets”, 16mm projector, cop radio, surf noise, and white noise presets. The SFX Machine PRO plugin has a 33 and a third, plus a 78 rpm album preset. This adds the sound that a needle on record players make as the record spins. To be honest, I have actually plugged my Denon record player into ProTools just to obtain this very sound. I have recently wanted to start one of my songs off with this fun throwback sound. Thanks goes out to SFX Machine PRO ! What a creative plugin, and with something for everyone!

Other effect Plugin offerings from THE SOUND GUY include the Backwards Machine, the ReSpatializer, and coming soon, the Spectral Machine.

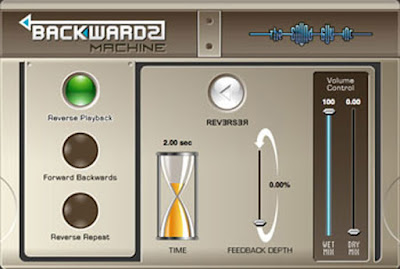
The Backwards Machine lets you reverse incoming audio in real time. There are three types of “reversing” in the unit, which are: “reverse playback, forward backwards, and reverse repeat”. Very interesting indeed. This would make getting a reverse reverb type of vocal a breeze. Very cool.


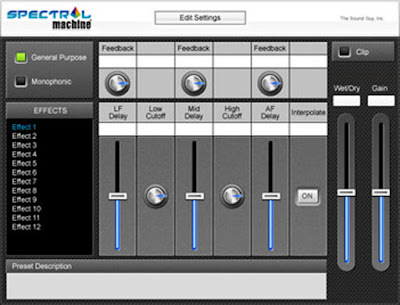
The Spectral Machine is a frequency domain plug-in featuring a wide range of unique spectral effects.

The ReSpatializer is an advanced panning, surround sound, and spatialization plugin.


The THE SOUND GUY website, where you can see more about this awesome plugin (as well as the others) others listed above, is here.

Make sure to check out all of these cool plugins by visiting the THE SOUND GUY !!!

Thursday, July 15, 2010

Second songwriting contest winner!

Announcing the second monthly winner of the Home Recording Weekly blog songwriting contest!


Congratulations to Lani Trock! A great tune that will forever be in my head!

Lani Trock's submission is titled “Alive”, and it is a wonderful song. It was well written, well recorded, and the vocals are simply inspiring. A job well done Lani!

Her name is Lani Trock (with a k on the end), sorry about the mis-spelling!

my website is http://www.lanitrock.com/

I recorded this song with producer Christian Davis- of Sly Doggie Productions

John Meenk played several instruments on it, and Marcos Lopez-Iglesias, (the original drummer of Duran Duran) recorded the drums for my record.

"Alive" is the title track off of my first record, "nine"

Here are her own words......

A little about me:

Born under the Hawaiian sun, Lani Trock was raised with a guitar on her tanned shoulder and saltwater in her wavy locks. A young boho beauty, she was writing music by age 15 and soon brought her ocean blues to Santa Cruz. She dove into coast’s music scene, sitting beside a beach bonfire with Stella in hand. But don’t mistake that bewitching green-eyed smolder for just another cookie-cutter crooner. She’s churned surf-rock and reggae into her uniquely innocent, suddenly sultry vocals that give you no choice but to burn one down. From the Hollywood Hills to Laurel Canyon you can find this girl belting the kind of honest lyrics that restore faith in pop music.”

Lani recorded her first studio album with award winning producer Christian Davis of Sly Doggie Productions. She is preparing for release of the album “nine,” and is filming her ambitious part live-action, part animated music video for the album’s first single, “Alive.”

Lani will be getting her own copy of Toontrack EZ Drummer software as a prize! EZ Drummer is one of the best sounding and easiest to use professional drum sample plug ins available today! Working with pre-recorded midi loops, played by the industries hottest performers, within EZ Drummer, makes making music both a snap and a joy!

What a month for music! The judging is becoming harder as the entries are getting better and better. I wish that I had the chance to offer second and third place prizes, because there are a lot of great songs that just need to be heard! Thanks to each and every one of you for submitting your material! Because of all of you I am having the time of my life. Keep the songs coming, and I look forward to “hearing” from you all again this next month!

This time around I am giving away IK Multimedia Amplitube 3 software to one lucky winner! IK Multimedia Amplitube 3 software is the ultimate guitar and bass amp/cab/rack/and pedal array simulation plug in available today.


Follow this link to read about the rules for entry, and as always, GOOD LUCK TO YOU ALL!

Subscribe today in order to keep up with the latest music news!

Wednesday, July 14, 2010

For a better mix, compress it!

I have been putting in some long hours doing just what I love to do most, writing and recording music! I have been working on some bass, drums, and vocal tracks lately, that just wont “fit” into the overall mix. The audio spikes drive the meters into the red, and the “belly” of the sound just gets lost. Levels seem to rise and fall at random, and the whole mix almost gets tossed out.

If this sounds familiar, than I urge you to please try using compressors on your tracks. I am not trying to convince you to flatten out all of your music, but, shaving off the peaks can do wonders. Plus, compressing the audio can bring the over all levels of the tracks up in your mixes. However, modern computer based DAW's (with monitors) have changed the way we use add and/or use compression. Most of us now look at the waveforms of our tracks, or the peaks and troughs, and then add compression until the dynamics are flattened. You must not spend your days “looking” at your audio to see if it is flat or dynamic. Let your ears do this part of the job. I have fallen into this trap myself, so believe me, let your ears work like they should!


Most often I use compressors in either one or two ways. Either I place a compressor in an audio track after it has been recorded, in order to control an unruly bass or drum, and then I re-record the track with the added compression. I also place a compressor across the main outputs (or the master fader) of a whole mix. Both of these methods can help to raise the overall levels of the audio by removing audio spikes. This means that we can manually raise the levels too, since there will be no spikes to push the meters into the red. This is what folks mean when they talk about “getting a louder mix”.

The only other way that I have ever used compression is across an incoming signal. Most often I place a compressor across an incoming guitar for leveling the notes of a solo, as I record it, or to level out a rhythm guitars' spikes as I record it. The problem with this style of compressing is that it cant be tweaked later, or ever removed since it has been recorded.

Let's dive in, shall we?

Compressors are wonderful tools for the home recording studio. Used properly they work like magic as they bring our tracks together, and make mixing unruly audio a snap. However, you must know how to use compressors in order to get good sounding tracks, and to avoid any unwanted “pumping” from over compressed tracks. The question that I am most often asked is “What compressor settings work best?”. Well, there are no settings that work best, it is all in what you are looking to accomplish with your compressor. So, lets quickly look at what the dials on compressors actually do.

Most compressors share the same basic controls. These controls are for attack, release, threshold, ratio, gain, and some will have a "hard to soft knee" dial as well. Let's see what these are for.

The first knob or dial that we should tackle here is the “threshold” dial. The “threshold” is the spot (or level) in your audio where you want the compressor to “engage”, or to start compressing the unruly audio. This is set at the point that is most often looked at as a “peak” in your audio track. This can be the pick noise from the bass track, the crack of a stick hitting the snare, a spike in your vocals, or any such sharp and sudden noise.

The next setting on compressors that I want to write about here is the ratio. The ratio is basically how much you want the compressor to compress once it is engaged. There are most often times settings “pre set” on the face of the compressors, which are most often times used in studios. But, this is not the rule. Common ratios are 5:1, 3:1, and the like. Like the name implies, the audio is compressed in level by the ratio of incoming level versus the ratio setting. Follow the link below to get a better understanding of ratios.

This is a better way to say all of this, taken from the Sound on Sound website.....

Ratio: When the input signal exceeds the Threshold set by the operator, gain reduction is applied, but the actual amount of gain reduction depends on the 'Ratio' setting. You will see the Ratio expressed in the form 4:1 or similar. Ratio is based on dB, so if a compression ratio of 3:1 is set, an input signal exceeding the Threshold by 3dB will cause only a 1dB increase in level at the output. In practice, most compressors have sufficient Ratio range to allow them to function as both compressors and limiters, which is why they are sometimes known by both names. The relationship between Threshold and Ratio is shown in Figure 2, but if you're not comfortable with dB or graphs, all you need to remember is that the larger the Ratio, the more gain reduction is applied to any signal exceeding the Threshold.”

The “attack” dial is how fast or how slowly the compressor starts to compress your audio once it reaches the set threshold. So, once the audio raises above the set threshold, the “attack” level tells the compressor how fast to compress the above threshold audio. The faster the “attack” time, the faster the audio is compressed. The longer the “attack” setting, the longer it takes to start compressing the audio.

This brings us to the “release” setting. The release tells the compressor how long to keep on compressing the audio once it has been triggered. The longer the setting, the longer the compressor is lowering gain levels, before it waits for the next signal above the threshold. The shorter the release setting, the quicker the compressor stops working once it has been triggered. The attack and release work together, and need some “play time” to really get the hang of. Listen to your compressor working as you play with the attack and the release.

The last knob or setting that I wish to write about is the “gain” setting. This is not rocket science. The compressor works at removing the audio that is considered a spike. The compressor works at leveling off our audio to a better “flatter” level of consistency. Since the over all level of our audio has now dropped, the gain setting will bring it up to the desired level. Basically, the gain allows us to bring up the level of our freshly compressed audio, back, perhaps, to where the spikes were in the first place. The compressed audio will now sit in the mix better as it can be heard at one nice constant level.

Once more, too much compression will take the dynamics of our tracks away. Dynamics are the quiet parts compared to the loud parts of a signal. Proper compression will only “shave off” the unwanted spikes and leave the rest of the audio as is. This is the secret of using compression correctly.

Saturday, July 3, 2010

Get your cameras out!


Billy Penn, over at 300 Guitars, is giving away a ZT amp to the winning photo entry!


If you submit the craziest image of yourself rockin out, then you just might win! Click here to visit the 300 guitars site for all of the info.