Friday, September 11, 2009

TOONTRACK releases Third Monster MIDI Pack fills with Peter Fredlander!

Toontrack Music proudly announces that Monster Drummer Peter Fredlander is back with the newest package in the Monster MIDI series - Monster MIDI Pack 3 - Fills!


Boasting more than 450 individually played fills with drum beats leading up to them, hierarchically organized by level of intensity and difficulty, this is a given must-have in your arsenal of MIDI and a shot of adrenalin to your creativity and songwriting! These fills and lead-ins will spice up your drum tracks like never before! Works for all genres - fills to suit anything from mellow Pop to insane Metal!

Works with EZdrummer®, Superior Drummer® or any GM compatible drum kit (optimized for 1 kick, 1 snare, 2 toms, 1 floortom, 2 crash-cymbals, 1 ride-cymbal).

Heck, for less than 20.00 dollars, US money, how can anyone go wrong? Get yours today here. Check out the awesome demo video here.

Wednesday, September 9, 2009

Propellerhead Record is released!

September 9, 2009


For those few of you left out in the dark, Propellerhead has released their sequencing software, Record! This is one amazing piece of software! For a complete run down on its features, follow these video links! The links are Here, Here, and Here.

Propellerhead Record gives you unlimited audio tracks, world class effects and mixing gear, and a whole new take on music recording. With an intuitive, straightforward interface and a hands-on approach to capturing performances, Record was designed for musicians - not audio engineers. This is recording done right.

Record comes in three different packages:

Record (On its own)This is the Record package to get if you don't own Reason and you feel you have no need for it.

Record + Reason Duo (together with Reason)If you are looking for a great offer on both Record and Reason, this is it.


Record for Reason Owners (at a discount for Reason owners)If you are using Reason already, and if you want great recording software that integrates fully with Reason, this is the one to get.
If you are ready to take the next step into your music creation and recording hobby, but are unsure just which way to enter, Propellerheads Reason, and Record is the way.

Reason supplies its users with a fast loading, very low draining (on your cpu), sound samples in an easy to use interface. Using Reason is a breeze, and the supplied effects are top notch. Reason gives us all basses, drums, pianos, organs, strings, and the list is endless.

Record uses the same approach as Reason. That is: easy to use, easy to understand, with great features and effects! You can not go wrong with Propellerhead!

Sunday, September 6, 2009

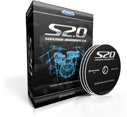
ToonTrack Superior Drummer 2.0 Review.

Ah, yet another new product that I have been dying to get my paws on. To be honest with you all, I have really, really been wanting to try out this new virtual drum software. After watching all of the online demo videos for Superior Drummer 2.0 , and listening to the supplied mp3’s of real songs that are using this software at the ToonTrack website, I knew that I would soon have to get Superior Drummer 2.0 and then use it in order to make my tracks shine. You can also see some great videos and demos here.


But first, my ongoing issues with Pro Tools LE…….

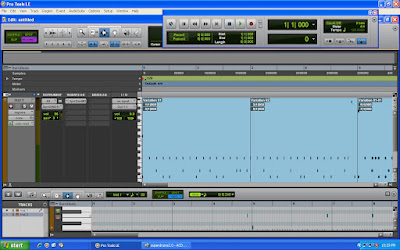
I found out too late that I had to upgrade to Pro Tools LE 8 in order to use ToonTrack Superior Drummer 2.0. This came as a shock, but now I have the awesome DAW that is Pro Tools LE 8 at my finger tips.
PRO TOOLS LE VERSION 8

I am ashamed to admit that a couple of days have ticked by up to this point, as I download upgrades, read the included PDF manuals, and then went online and registered all of this great new software. The time was increased because, like many of us recording nuts, I wanted to play right away. Just please take it from me; bypassing steps will get you no where, so take your time and perform them all the first time through!

Next, I had to get past what appeared to be a problem with Pro Tools LE 8 freezing up upon launch. I figured out, only by luck, that it was one of the included plug inns causing this deep freeze. Long story short; I lost all of the included Pro Tools LE 8 plug inns that came with my new Pro Tools LE 8 purchase. However, Pro Tools LE 8 now launches and works fine.

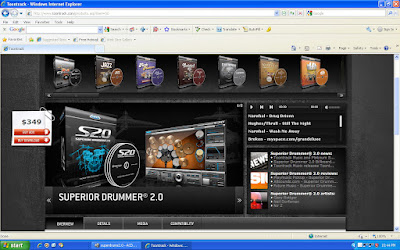
SUPERIOR DRUMMER 2.0 ORDER PAGE

Superior Drummer 2.0 ships with, or “comes on” five separate DVD’s. I will say that they loaded in a very short time and with no trouble at all. Included on these DVD’s are the usual midi files, Superior Drummer 2.0, EZ Player Pro, and ToonTrack Solo software.

Allow me to explain what EZ Player Pro and ToonTrack Solo actualy do.

ToonTrack Solo is a VST (virtual stand alone) application that lets you use Superior Drummer 2.0 in a stand alone, or perhaps a live situation. EZ Player Pro is where the magic happens, so to speak. EZ Player Pro is basically a midi sequencer that allows a player to audition, select, and arrange midi drum files and then simply drag and drop them into any sort of DAW. Remember, Superior Drummer 2.0 makes no drum tracks by itself. Midi is required and these two programs work perfectly hand in hand. To watch some great videos that explain ToonTrack solo and EZ Player Pro, just follow the two links!

So, as I mentioned, I uploaded the software, read PDF manuals, registered the software online, and then I got stuck once again. Superior Drummer 2.0 simply would not work with Pro Tools LE 8! UUUGGGHHHH!!!!!

After a day or two of working out all of these bugs, I still could not get ToonTrack Superior Drummer 2.0 to work properly. So, I went back to reading PDF manuals. I have read and re-read more PDF manuals than I care to admit up to this point. I have followed every instructional step that they have detailed to the letter, and all to no avail.

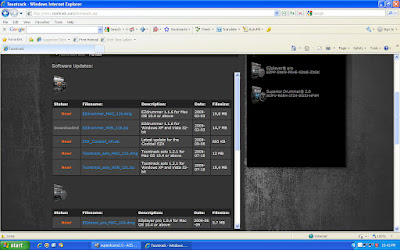
UPLOAD PAGE FOR FIX UP

After some more long hours online, just trying to find out what was going on, I found out that a separate download has been posted on ToonTracks website that fixes my ongoing (Superior Drummer 2.0 and Pro Tools 8 on a windows XP machine) problems.

It is nice to know that these good folks are on top of the situation! However, this meant yet another download and more stuff to install, and some more PDF Manuals to read. Now, I was finally ready to drum.

And drum I did!

After this one last hurdle was cleared, I am proud to post that everything works perfectly! Superior Drummer 2.0 is simply one very incredible package, to say the least!

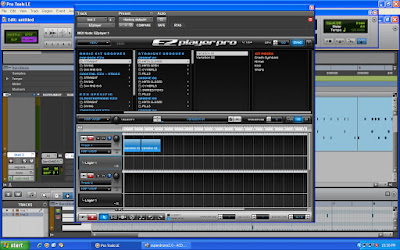
EZ Player Pro is used in conjunction Superior Drummer 2.0. EZ Player Pro is a midi file browser with drag and drop functioning. It is fast and a breeze to use. This is a plus for people like me, as I do not enjoy messing around with intricate midi settings like midi ins and outs, all of which are not needed to be performed when using EZ Player Pro. One great bonus feature that I noticed was that you can also drag and drop any midi files that you currently have or own into EZ Player Pro and then use Superior Drummer 2.0 to play them back. This is huge because you can then customize each drum hit to complete perfection! It is also a fast way to audition midi files and then do what you want to; write your music.


Another great feature in EZ Player Pro is the fact that you can quickly and easily layer midi drum files. Layers are created by actually placing different midi loops onto separate tracks within EZ Player Pro. No more copying and pasting separate drum hits in order to create your own drum fills! Getting unique drum patterns is also quickly performed using this layers system. Well done!

Let’s dive in to the drum sounds themselves…

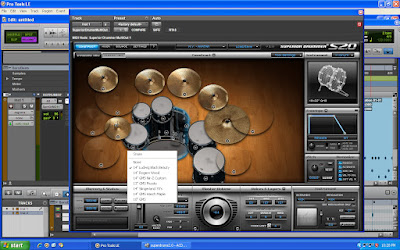
The actual drum hits within Superior Drummer 2.0 sound great by themselves, but you can go further and sculpt them to your exact tastes via a couple of different user interface screens. These screens are the “Construct” screen the “Mixer” screen.
Construct screen

The “construct” screen is where you construct, or put your dream kit together. There is no shortage of drum kit pieces to choose from either, as ToonTrack has included lots of popular drum kit pieces for us all to select from. Auditioning each piece is a breeze, and it can even be done on the fly, or as the midi loops are playing back through Superior Drummer 2.0.

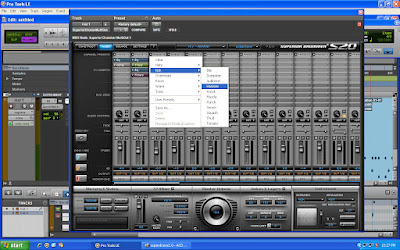
Mixer screen

The mixer screen is where you go to custom tailor the individual kit pieces sound. This works like a real mixer might, with general microphone volume sliders, custom routing of each kit piece, and the adding of effects. But it soon gets a lot deeper.

The mixer section allows for bus routing, adjustment of the direct microphones as well as above/below mics, over head mics, and you can even control the bleed of the other kit pieces into and out of the many individual microphones!

The effects are no joke either!

You can place up to five effects on each kit piece microphone (as direct in line inserts) as well as placing effects into the kit as bus routing and effect send and returns! Obtaining perfection is nothing short of a snap of the fingers!

The five included effects are supplied by Sonalksis, and they are a 5 band EQ, a Transient, a Gate, a Compressor, and a High/Low pass filter. These effects all sound better than great, and they all come loaded with preset effect settings. You can choose from an array of custom set effect presets in order to quickly get that “phat tone” out of a kit. The certain effects that are used to get that particular preset sound, with their exacting settings, are installed instantly for you as you select them!

You can even try the presets out quickly while the midi is playing, in order to settle on the one that is closest to your envisioned sound. Then you can keep the settings as they are, or you can “tweak/adjust” each individual effect to your hearts content!

I found that by using the effect presets, (great professional settings set by Sonalksis) I could dial in my dream drum kit sound in seconds flat. The mixer screen and the included effects by Sonalksis just keep making me feel warm and fuzzy way down deep inside!

So, to wrap up this review, I proudly give two thumbs way, way up to ToonTrack for yet another realistic sounding, easy to use, professional in every conceivable way, virtual drum product! Think of Superior Drummer 2.0 as your drum solution! Go out right now and get it.

Friday, September 4, 2009

ALTERNATE TUNINGS FOR GUITAR

Recently I posted an entry where I explained that I would soon post some information about alternate guitar tunings. Well, the time has come. Some time ago I wrote an Ebook that I used to sell titled "Same Day Guitar". Same Day Guitar showed people how to play the guitar on a beginers level. It contained lots of images, text, and some videos too. Since then, I have tried to share some of this information by placing it into this blog from time to time. Here is one of these times.

Alternate tunings for the guitar can be a whole other world of their own. I remember the first time I heard of these, and I was mystified. Why would anyone want to tune their guitar differently?

I will give you the coolest reason now…..THE SOUND!!!!

Alternate tunings can add a warm texture to any song, by just simply tuning a second guitar, or rhythm guitar to an alternate tuning. In fact, alternate tunings can give a song a completely different sound all together. Let’s not forget about the slide guitarists of the world or the steel guitar players of that good ole country music; for they have been tweaking their guitars tunings for as long as their music’s genres history is. All of this diversity comes from doing things just a little different. Let’s explore some of the easiest and most common alternate tunings, shall we?

The first alternate tuning I will discuss is the “open D” tuning.

This is perhaps the most commonly used open tuning in alternate rock music today. It is called “open D” tuning because you actualy tune all of the strings of a guitar to the triad of notes that make up the D chord (D, F sharp, and A). When done properly, the strings will sound a perfect D Major chord while strummed open, or without any fingers on the strings. Get it, when played open it is a “open D”.

Yes, all of the common chord fingerings will have to be altered once your guitar is alternately tuned, but there is some magic here. All major chords can be played with one finger barring all the strings on any certain fret. Usually this is done with the index finger or the middle finger.

Try setting a slide on the strings of the guitar (but do it easily because not much pressure is needed here) and “slide around for a while. Slides are inexpensive, and well worth the small cost. Slides are most often placed over the middle or ring finger of the left hand (right handed folks), and slides are placed onto the guitar strings only, and just over the fret.

At each fret a major chord will be sounded. This is a great way to add some beef to your tracks. The song "No More Tears", by Ozzy Osborne and Zack Wild is played with this beefy open D tuning. Basically, the rule of thumb is that if you can hear a slide being used on a guitar on a song, then you can bet it is tuned to an open chord tuning of some sort.

Using a capo with open tunings can add all the fun and excitement as the capo can bring on a guitar in standard tuning. If your voice is not a perfect match for (lets say) the key of “D”, a capo can quickly help to change the key of the open tuning. I know that this very thing is what capos are for, but the point here is not to limit your creative juices.

Want some more cool reasons to tune up your guitar to an open chord tuning? How about the harmonics (when a fret is strummed with a mute), when all six strings of the fifth, seventh, or twelfth fret are strummed at once, will now ring out with a major chord.

This trick has been used in too many songs to list, yet, it still sounds wonderful. One song that has this effect in it that comes to mind is “Talks to angels”, by The Black Crowes.

Now that you have the knowledge of a few things to try out, lets tune up your guitar to an open chord tuning. I will quickly detail how to tune your guitar to “open D”.
The strings are tuned as follows for an open D tuning:

Fat E string is lowered to a D
A is left alone
D is left alone
G is lowered to an F sharp
B is lowered to an A
E is lowered to a D

Here is a fun little secret. When you purchase a guitar slide it will most likely come with a rolled up piece of paper inside of it. When this roll of paper is unrolled it will reveal a ton of different open chord tunings. A lot more open tunings than you will ever need. This information, all on one piece of paper, might become very handy to you if you indeed enjoy open tunings, and the slide.

Another alternate tuning is the “drop D” tuning. This takes two seconds to do, and adds a deepness to any song that you add it to. Simply drop the low “E” down to a “D”. That’s it! A deep tone is added to a “D” open end chord. A lot of rock music that has a “chunking”, muted guitar rhythm in it gets it by using this to its full advantage. It also adds a lot of “bottom end” to any acoustic performance. In fact, Eddie Van Halen uses this tuning so much; he helped design a tremolo that quickly drops the “E” string to a “D”, with just the snap of a lever.

These are just two of the many alternate tunings that are out there, so get creative, and try some of your own! One last note to you all is this: try to translate the notes of your favorite chords into open tunings. This creates some awesome sounds and some great new riff ideas!

Friday, August 28, 2009

ToonTrack EZ Drummer 2.0 Review.


Recently I had acquired ToonTrack EZ Drummer 2.0, and have been using it for a couple of weeks straight. I have found some very good points to this package, but with my DAW version (Pro tools LE 6.8.1) I have found a work around. Here are the details.

To begin, ToonTrack is the leader in virtual drumming software.

The sound patches in their products are incredible in sound, and as close to the real thing as possible. But, if that isn’t enough for the inner songwriter in you, the good folks at ToonTrack went on and added different sections to their products. The different sections include a virtual microphone mixer and a loop browser with tons and tons of loops for us all to drag and drop into our musical creations.

Why not invite a professional drummer to play on your cuts? Some of the professional drummers that perform the hits, smashes, and loops in midi form for ToonTrack are Thomas Haake, Sterling Campbell, and NIR Z, just to name a few. These people are without a doubt the best at the style of music that they play. I just love the digital age!

The EZ DRUMMER 2.0 main kit interface.


Perhaps you might want to jump over to a ToonTrack EZ Drummer 2.0 video demonstration first, and then return for more of the finer details. Here is a link to the video. Be sure to click on the speaker at the lower right in order to hear the sound.

As the software plug in finishes loading (as an RTAS plug in) the user is taken to the “drum kit room page”. This screen is where the user can audition the individual drum kit pieces (snares, toms, cymbals, ect.), and the user also can interchange among the many other kit pieces from a drop down menu. Putting together your dream kit is a snap, and then it is on to the midi drum loops.

Choosing the loop that is perfect for your song is as easy as point and click. ToonTrack has created a very easy to use browser for finding and selecting the perfect loop. The user may audition loops on the fly, and then when the one for your work is located; it is only a drag and drop to completion. EZ Drummer 2.0 ships with tons and tons of loops in commonly used timings and styles.

Each loop is played in many different ways, such as with the high hat closed, open, half way, or with a ride. Each style is performed a little bit differently too, so finding a loop for the verse, and a slightly different version of that loop for the chorus is a breeze.

I (once again with my PT-LE 6.8.1) could not seem to drag and drop the loops into my tracks. However, I found a solution to that problem and I explain the fix HERE.

OK. You have found the drum loop that is just perfect for your next number one smash hit and then you placed the loop into your song. So now what?


Opening the mixer will allow the user to “fine tune” the drum loop as you want it to sound for your particular style of song. The sliders actually increase or decrease the individual microphones in volume. The microphones in EZ Drummer 2.0 are on the kick, two on the snare (above and below), tom microphones, overhead microphones, and room microphones. How is that for precise mixing? Rather amazing, if you were to ask me. I had no problem customizing my kit so that it “sat” in my mix perfectly. I found myself returning to the mixer again and again in order to tweak the microphone level settings, just to see, or hear, what would happen. I should also mention that ToonTrack has included some very impressive sounding pre-set settings in the mixer area. These settings are named “tight kit, ambient kit, basic kit, and the default kit) and they are great sounding by themselves, or perhaps you can use these settings as a starting place. Either way, it was nice to see that the folks at ToonTrack took the time to include this feature.

Adding fills with EZ Drummer 2.0 and then writing added notes with midi.

EZ Drummer 2.0 comes with tons of fills included. These loops are also midi files, and are added to your tracks with a simple drag and drop. After you audition the fills, adding the perfect one to your song is a breeze.

I found adding an extra drum hit here or there was not an issue at all. I used the Pro Tools midi tools, and added the notes where I wanted them. Believe me, it is that simple! ToonTrack EZ drummer 2.0 integrates seamlessly into Pro Tools LE 6.8.1. Way to go!

Wrap up…

Over all I found ToonTrack EZ Drummer 2.0 to be a great sounding package that was very easy to work with. The songs that I have added EZ Drummer 2.0 to sound incredible, and just like a well known professional drummer has done the percussion for me. Good bye to lame digital midi drum tracks, and a warm hello to ToonTrack EZ Drummer 2.0.

What are you waiting for? Get it!

Monday, August 24, 2009

IK Multimedia Releases GrooveMaker® for the Apple iPhone and/or the iPod touch.

Now everyone can create electronic, dance and hip-hop Tracks; non-stop, in real-time, everywhere!

Yes, there is an app for that! Sorry, I could not help myself.

Writing music on the go?

If you have an Apple iPhone or an iPod touch, IK Multimedia has a new application for the song writer in us all. How cool is this?

IK Multimedia is proud to announce the launch of GrooveMaker® for iPhone/iPod touch - the revolutionary app that allows you to create and share non-stop electronic, dance and hip-hop songs on the go in real-time just like a professional DJ or music producer.

GrooveMaker, a full porting of the previous Mac/PC application from IK Multimedia, gives you a completely new way of making music with audio loops. Thanks to IK Multimedias patented “groove generator” technology, you can automatically remix the hundreds of loops included, on the 8 available tracks, in virtually limitless ways, all with one touch.

With GrooveMaker you can create professional full-length tracks and grooves for your music compositions, ambient soundtracks, movie scores and more. And it’s so easy to learn that you’ll be creating your songs and remixes in minutes.

Everything in GrooveMaker is done in real-time, without ever having to stop the music. It’s like working with a real instrument! You can add, remove, and replace single or multiple loops as you listen, so there’s no stopping to your creative flow.

GrooveMaker makes remixing a breeze and a totally new experience.

Composing is as easy as “drag and drop” and puts you at the controls of the music. It’s your mix, and it all happens in real-time. Pick a drum groove. Layer on a bass riff. Add a bass drum beat. Spice it up with melodic and rhythmic lines, leads, pads or effect loops. Browse millions of grooves with one click and pick the ones you like. Change tempo on the fly without stopping the music. Then save it all as a new remix and export it to your Mac/PC.

With GrooveMaker, ANYONE can be a DJ.

GrooveMaker features

- Instantaneous control over 8 stereo loop tracks
- Massive loop library of drums, bass, bass-drums, lines, pads, percussion, effects included
- Play, Mix and Randomize loops on the fly
- Combine studio-quality loops to produce a million possible grooves
- Manipulate loops in real time (pan, volume, mute, solo, group, tempo)
- Arrange grooves easily with drag and drop to create full-length tracks
- Save, preview and recall your mixed tracks
- Upload your tracks as hi-quality WAV file to your Mac/PC (Wi-Fi network required)
- Interactive Help feature allows for quick learning, simply follow the indicated steps.

There are 4 GrooveMaker applications already available and 4 more to come soon for every dance music style, including a fully functional FREE version that you can download to start making music right away!

GrooveMaker FREE
- House and Hip-Hop styles, 125 loops included (78-125 BPM), FREE


GrooveMaker Club
- Techno, Trance and House styles, 189 loops included (130-135-145 BPM)


GrooveMaker Hip-Hop
- Hip-Hop style, 315 loops included (80-85-90-100 BPM)


GrooveMaker House
- House style, 315 loops included (120-123-125-127 BPM)


All these GrooveMaker applications are already available for download and purchase from the Apple iTunes App Store.

For more information, video and audio demos, please visit: http://www.groovemaker.com/

Sunday, August 23, 2009

Using MIDI in Pro Tools LE 6.8.1.

This post will explain some basic information on recording midi using Pro Tools. The version of Pro Tools LE that I am currently using is 6.8.1. There are some upgrades available, but that is another story.

Different midi programs can work differently in Pro Tools. Working with midi in what is known as “piano roll” is basically always the same, well give or take. Writing midi information can be as simple or as detailed as you might like it to be, but you might set up for it, and approach the track set ups differently; depending on the midi software itself.

I would like to extend some basic information to those that might need it, on a bunch of midi stuff. I’ll discuss writing and editing midi notes, midi note values, and midi note duration. Keeping in step, I’d like to also supply some information on automating midi, with such parameters as setting note velocity, volumes, and panning.

I will use a couple of different midi software examples in this post in order to perhaps help the widest range of midi music writers. Again, this blog post is for Pro Tools version 6.8.1.

Writing MIDI in Reason.

Let me start with writing midi using the piano roll style of editor found in Reason software. Reason is set up in Pro Tools LE 6.8.1 by opening up a new stereo audio track. Let’s say we are writing a stereo bass line in Reason, using the NN19 module.


All that one needs to do is write the midi notes into Reasons piano roll.

Reason is so darn easy to work with that I highly recommend it to everyone. Writing and/or removing midi notes in Reasons piano roll is done with the pencil and the eraser tools. Enter the duration value of the note that you wish to write, lets say a quarter note, and then find the note that you need (A through G), and write it using the pencil tool. Switching the note duration value changes the grid in the piano roll to that value, so adding or changing midi notes is easy to “hear” before you write the notes.


The main point here is that the piano roll remains in Reason. Reason, in Pro Tools LE 6.8.1 shows up as an audio track. We do all of our midi writing, editing, automation, ect., in Reason itself. So what about writing and editing midi in Pro Tools? So glad that you asked!

I recently received ToonTracks EZ Drummer 2.0 so I will use this awesome software for the next example. I quickly found out that I needed to open two new tracks in Pro Tools in order to write midi using EZ Drummer 2.0. First, I had to open a stereo audio track, and select EZ Drummer as an active insert.


Next I found out that opening up a new midi track was necessary in order to record the midi notes. This is due to the version of Pro Tools that I am currently using. Pro Tools 7.0 and on do not require this midi track, as you can simply drag and drop the midi straight into the stereo audio track. Make sure to select EZ Drummer as your midi out on the midi track, so the notes that we will put on the midi track will go where they should go. Refer to the image above to see this.


Once I opened up the EZ Drummer software and found the loop that I wished to open, I found that it would not allow me to drag and drop it onto any tracks at all. Oh well, instead of giving up I decided that it was time to try some new methods. I had to select “import midi”, under the “File” tab, and manually find the loop in my computers drive. This proved to slow me down at the beginning, but I soon got pretty good at locating the desired loops.


The midi information will appear on a new midi track, so now you will have two midi tracks. You must now select the midi notes that you want from the loop (if not the whole loop), highlight them and then copy and paste them to where you want them in the first midi track. No problem, right? Once this task is complete you can delete the imported midi track. Next, find another loop and repeat the importing midi process. Again, look at the image above to get a better look at this process.

After putting the loops just where I wanted them, it was time to add some single midi notes. I wanted to add some cymbal crashes and some extra kick and snare hits to my track. Making your midi track larger makes things easier to work with. Click on the mini sized keyboard and select “jumbo”. Next, use the midi zoom buttons to enlarge the midi notes and the piano roll grid spacing. They are located in the upper left hand corner of your Pro Tools interface. Press or click on the top most part increases the size of the individual midi notes.


Adding notes is as simple as drawing them on the grid with the pencil tool. If it is drawn where it should not be, then just use the grabber tool to highlight the note, and move it where it should be. Remember to make sure that you have the correct movement type in the grid set up. Having the edit mode set to “grid” will move the note to the next note value. Having the edit mode set to “spot” allows you to type in the exact placement of the notes beginning in means of bars and beats.


If you click on the track view button (below the midi tracks title) you will be able to select between “blocks, regions, notes, velocity, pan” and on and on. Choosing velocity allows you to raise or lower the notes velocity using the pencil tool. Simply highlight the note in which you desire to alter with the grabber tool, and raise it or lower it using the pencil tool. You use this same procedure to change a notes panning, volume, or whatever you desire to alter.