If you are like me (and I assume that you are if you have come to visit this blog) you have a knack for writing, performing, and recording your own original music. I have tried to explain how much I enjoy chipping away at a riff, or a melody that plays itself in my head, over and over until it gets recorded. Slowly but Shirley, as we layer sound texture on top of sound texture a song takes shape. Using our signature tricks and tones, we craft our masterpieces to be uniquely and unmistakably our own.
I have recently felt “a calling”. I decided to get real and put a fair amount of skill and most of my time into recording an albums worth of material. I have had the songs outlined, and roughed out on ProTools, but they needed so much more. There were solos to get just right, bass lines to smarten up, and lots and lots of drum fills to score. This would be a journey, and I had made the decision to set off.
I had a burning passion to get this music out from deep within, and into a format that I could share with the rest of the world. Days soon turned into months. People wondered where I had gone. I have been working day in and day out, almost to access. But it wasn’t like work at all, but an obsession.
Well, now the end is near. Often times I find myself tweaking this or that little effect, or adding a little EQ on this or that, but for the most part the collection is finished. Twelve or thirteen songs are now in the mp3 format, and ready for the next stage of their existence. It is true that most of these songs have no vocals, but I plan on recruiting some help on that front. I lack the ability to sing well, but singing is a large part of a song. How else does one get their ideas or emotions out to the listener? However, the songs are good, rather good I think, in quality and in originality.
Here is the problem.
What do I now do with the songs? Have you ever come across this problem at this point in the game? I was so focused on getting the songs recorded to the best of my ability that I didn’t even think about what I would do with them at the conclusion of the recording process.
I have had my music played on the radio. I can’t describe to you the joy that it brought me to hear my work over the air waves. That was really a cool time. I have also uploaded some of my older material to several different indie music sites, with little to no excitement. Granted, the quality of those songs is not as good as the ones that I have recently finished, but the idea of the songs got across.
Basically what I am getting at here is “where do we turn in order to obtain some much needed feedback”, and dare I say, “Where do we head to as we seek professional listeners”?
This is a time like no other in history. I know that we all have the ability to get ourselves heard by masses and masses of people, via the internet. One only need look to the web to witness the inspiring overnight success stories that have come to see the light of day. How can we forget the infamous YouTube favorite “Chocolate Rain”? This is only one example in a long line.
One common problem that I have is that after visiting only three or four indie bands MySpace and Face Book page visits, I have heard enough. I wonder, “Would another person find me in this same way?” The answer must be “Probably not”.
My music is in demo quality. “Demo quality” has come to mean quality, by the way. Moby, like so many others, have not only written but also have recorded their music in bedroom studios. With all of the computer software and awesome DAW’s available to anyone with a modest income to spend, one only need put in the time in order to get a good sounding song.
However, “Demo quality” is not radio ready, not by a long shot. I feel that I should offer up the truth that I wish to sell my songs, not my performances. It is getting the right people to listen to my material that I am seeking advice on.
The solution.
What I have planned is nothing short of a full-on assault on the music industry, using some of the many methods that we all have available to us. Go ahead right now and bookmark this site or subscribe to this blog, and follow along with me on my journey. I will detail each and every effort that I make, detail what is involved in the steps that I take, and I will detail what I find out from taking the steps that I will take. If you want to learn how to get your music heard, than you will want to follow this blog.
If you are in the same musical place that I am, than you should be subscribing right now! By following along you will find out what works and what does not. I will share with you my best ideas, and also the many bad ideas. I will share the costs of these ventures, the results, and the many different methods that I will use to get my music heard and to get my name out there. Won’t you join me?

Monday, September 21, 2009


Monday, September 14, 2009
IK Multimedias Metal guitar amp simulation review.
Once again I have had the good fortune to review another incredible product from IK Multimedia. This review is of IK Multimedia Metal guitar amp/cabinet/microphone simulator.

But just what is Metal?

Metal is a software plug-in (VST and/or an RTAS) for your favorite recording software. It acts and sounds just as a guitar amplifier and cabinet combination would, with all of your favorite pedals included too! But there is so much more to Metal that one needs to dig in and look deeper. Metal contains all sorts of gadgets; in the form of knobs, sliders, rack effects, a tuner, and some awesome guitar pedals.
After uploading IK Multimedia Metal onto your recording computer (Mac or PC) all you will then need to do in order to start making music is to plug your electric guitar into a computer digital interface of some sort. That’s it!
The end result? One heck of an awesome guitar amp/cabinet selection that will transform your guitar riffs and guitar licks into pulsating, pounding, full-on metal assaults!
I have not ever been in a heavy metal rock band. I have, however, written some heavy metal songs. So now I had the opportunity to use IK Multimedia Metal just to see how well it stacks up against some of the most heavy metal guitar tones of all time. To make a long story short, it stacks up just fine. With all of the included rack and stomp pedal effects in Metal I had no trouble at all getting very distinct metal guitar tones. If you consider the difference in cost between the real thing verses Metal, the solution is a no brainer.
If you are like me, a true guitar tone designer, then you will love Metal. I found that using Metal in order to obtain some very dirty guitar tones that are remarkably close to some of my favorite Metal bands (Metallica, Ozzy, and AC/DC) was amazingly easy! You can even “put together” your dream amp with Metal, with the choice of selecting all kinds of amp styles and types including everything right down to guitar amp tube types!
Putting together a recording “dream guitar rig” is also made easy with Metal. Metal software includes some great user pre sets that you can audition, and alter to your demanding tastes. The user presets are not only a great starting place, but they sound great by themselves too!
Playing thru two complete guitar rigs at the same time is also possible in Metal. This is what peeked my interest due to an obsession with getting that hard hitting, yet “note articulate” guitar tone. One dirty channel and one heavy distortion channel is what this tone is all about. Metal is fast and easy to use in order to get whatever tone your “mind hears”.
The included stomp pedals that come in Metal are great in tone, and pretty cool looking too. I like the little extras sometimes, what can I say? Metal is full of these extras it seems. Every effect, weather stomp pedal or rack type, is very well laid out, very easy to adjust, come loaded with user presets, and they look great to boot! Having everything so well laid out and easily adjustable sure makes finding that one particular tone a breeze. However I found it hard to stop at just “good” and I seem to keep on tweaking this or that, and go on adding on more and more effects.
I don’t like to read a lot of different manuals in order to make music. Soon after Metal was installed I was jamming. No need to read a single page of any manual at all. This sums up the ease of use for Metal, but let me give some more examples.
The user interface in Metal is easy to navigate and getting to just where you want to be is as fast as a click of the mouse. A collection of buttons up in the upper right hand part of the user interface makes changing to the different screens fast. Finding and tweaking that certain effect is easy due to pop up lists; in both the rack effect section, and the stomp effect section. The same is true with the auditioning of the many user presets for the amps, cabs, microphones, and effects. Well done IK Multimedia!
To wrap up this review, I would reccomend that you follow the links posted here and listen for yourself. The videos on IK Multimedias site will give you an idea of what you can expect from Metal. Bottom line is that if you are a Metal head guitar player, wather live or in your home recording studio, Metal might be the best plug in out there for your tones. It sounds great, works fast, and is sooo diverse. Get it!
What follows below are some screen shots of Metal that detail the many screens that make up the interface. I could not place them all on this post as it would be way too many.
The many stomp pedal effects.
What follows below are some screen shots of Metal that detail the many screens that make up the interface. I could not place them all on this post as it would be way too many.
The many stomp pedal effects.


A couple of the amp types.


Friday, September 11, 2009
TOONTRACK releases Third Monster MIDI Pack fills with Peter Fredlander!
Toontrack Music proudly announces that Monster Drummer Peter Fredlander is back with the newest package in the Monster MIDI series - Monster MIDI Pack 3 - Fills!

Boasting more than 450 individually played fills with drum beats leading up to them, hierarchically organized by level of intensity and difficulty, this is a given must-have in your arsenal of MIDI and a shot of adrenalin to your creativity and songwriting! These fills and lead-ins will spice up your drum tracks like never before! Works for all genres - fills to suit anything from mellow Pop to insane Metal!
Works with EZdrummer®, Superior Drummer® or any GM compatible drum kit (optimized for 1 kick, 1 snare, 2 toms, 1 floortom, 2 crash-cymbals, 1 ride-cymbal).
Heck, for less than 20.00 dollars, US money, how can anyone go wrong? Get yours today here. Check out the awesome demo video here.
Wednesday, September 9, 2009
Propellerhead Record is released!
September 9, 2009

For those few of you left out in the dark, Propellerhead has released their sequencing software, Record! This is one amazing piece of software! For a complete run down on its features, follow these video links! The links are Here, Here, and Here.
Propellerhead Record gives you unlimited audio tracks, world class effects and mixing gear, and a whole new take on music recording. With an intuitive, straightforward interface and a hands-on approach to capturing performances, Record was designed for musicians - not audio engineers. This is recording done right.
Record comes in three different packages:
Record (On its own)This is the Record package to get if you don't own Reason and you feel you have no need for it.

Record + Reason Duo (together with Reason)If you are looking for a great offer on both Record and Reason, this is it.

Record for Reason Owners (at a discount for Reason owners)If you are using Reason already, and if you want great recording software that integrates fully with Reason, this is the one to get.
 If you are ready to take the next step into your music creation and recording hobby, but are unsure just which way to enter, Propellerheads Reason, and Record is the way.
Reason supplies its users with a fast loading, very low draining (on your cpu), sound samples in an easy to use interface. Using Reason is a breeze, and the supplied effects are top notch. Reason gives us all basses, drums, pianos, organs, strings, and the list is endless.
Record uses the same approach as Reason. That is: easy to use, easy to understand, with great features and effects! You can not go wrong with Propellerhead!
Sunday, September 6, 2009
ToonTrack Superior Drummer 2.0 Review.
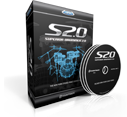
Ah, yet another new product that I have been dying to get my paws on. To be honest with you all, I have really, really been wanting to try out this new virtual drum software. After watching all of the online demo videos for Superior Drummer 2.0 , and listening to the supplied mp3’s of real songs that are using this software at the ToonTrack website, I knew that I would soon have to get Superior Drummer 2.0 and then use it in order to make my tracks shine. You can also see some great videos and demos here.
But first, my ongoing issues with Pro Tools LE…….
I found out too late that I had to upgrade to Pro Tools LE 8 in order to use ToonTrack Superior Drummer 2.0. This came as a shock, but now I have the awesome DAW that is Pro Tools LE 8 at my finger tips.
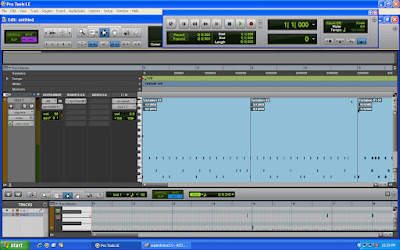 PRO TOOLS LE VERSION 8
I am ashamed to admit that a couple of days have ticked by up to this point, as I download upgrades, read the included PDF manuals, and then went online and registered all of this great new software. The time was increased because, like many of us recording nuts, I wanted to play right away. Just please take it from me; bypassing steps will get you no where, so take your time and perform them all the first time through!
Next, I had to get past what appeared to be a problem with Pro Tools LE 8 freezing up upon launch. I figured out, only by luck, that it was one of the included plug inns causing this deep freeze. Long story short; I lost all of the included Pro Tools LE 8 plug inns that came with my new Pro Tools LE 8 purchase. However, Pro Tools LE 8 now launches and works fine.
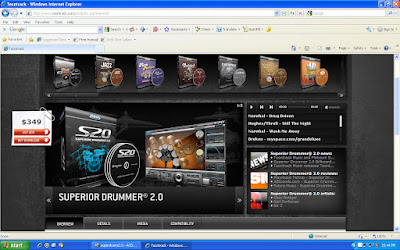 SUPERIOR DRUMMER 2.0 ORDER PAGE
Superior Drummer 2.0 ships with, or “comes on” five separate DVD’s. I will say that they loaded in a very short time and with no trouble at all. Included on these DVD’s are the usual midi files, Superior Drummer 2.0, EZ Player Pro, and ToonTrack Solo software.
Allow me to explain what EZ Player Pro and ToonTrack Solo actualy do.
ToonTrack Solo is a VST (virtual stand alone) application that lets you use Superior Drummer 2.0 in a stand alone, or perhaps a live situation. EZ Player Pro is where the magic happens, so to speak. EZ Player Pro is basically a midi sequencer that allows a player to audition, select, and arrange midi drum files and then simply drag and drop them into any sort of DAW. Remember, Superior Drummer 2.0 makes no drum tracks by itself. Midi is required and these two programs work perfectly hand in hand. To watch some great videos that explain ToonTrack solo and EZ Player Pro, just follow the two links!
So, as I mentioned, I uploaded the software, read PDF manuals, registered the software online, and then I got stuck once again. Superior Drummer 2.0 simply would not work with Pro Tools LE 8! UUUGGGHHHH!!!!!
After a day or two of working out all of these bugs, I still could not get ToonTrack Superior Drummer 2.0 to work properly. So, I went back to reading PDF manuals. I have read and re-read more PDF manuals than I care to admit up to this point. I have followed every instructional step that they have detailed to the letter, and all to no avail.
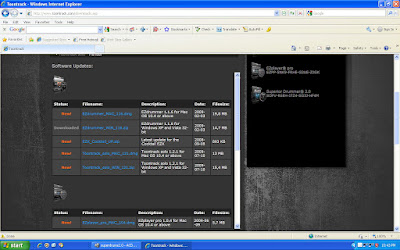 UPLOAD PAGE FOR FIX UP
After some more long hours online, just trying to find out what was going on, I found out that a separate download has been posted on ToonTracks website that fixes my ongoing (Superior Drummer 2.0 and Pro Tools 8 on a windows XP machine) problems.
It is nice to know that these good folks are on top of the situation! However, this meant yet another download and more stuff to install, and some more PDF Manuals to read. Now, I was finally ready to drum.
And drum I did!
After this one last hurdle was cleared, I am proud to post that everything works perfectly! Superior Drummer 2.0 is simply one very incredible package, to say the least!
EZ Player Pro is used in conjunction Superior Drummer 2.0. EZ Player Pro is a midi file browser with drag and drop functioning. It is fast and a breeze to use. This is a plus for people like me, as I do not enjoy messing around with intricate midi settings like midi ins and outs, all of which are not needed to be performed when using EZ Player Pro. One great bonus feature that I noticed was that you can also drag and drop any midi files that you currently have or own into EZ Player Pro and then use Superior Drummer 2.0 to play them back. This is huge because you can then customize each drum hit to complete perfection! It is also a fast way to audition midi files and then do what you want to; write your music.
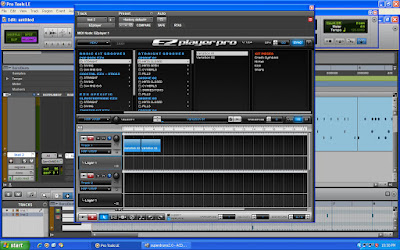
Another great feature in EZ Player Pro is the fact that you can quickly and easily layer midi drum files. Layers are created by actually placing different midi loops onto separate tracks within EZ Player Pro. No more copying and pasting separate drum hits in order to create your own drum fills! Getting unique drum patterns is also quickly performed using this layers system. Well done!
Let’s dive in to the drum sounds themselves…
The actual drum hits within Superior Drummer 2.0 sound great by themselves, but you can go further and sculpt them to your exact tastes via a couple of different user interface screens. These screens are the “Construct” screen the “Mixer” screen.
Let’s dive in to the drum sounds themselves…
The actual drum hits within Superior Drummer 2.0 sound great by themselves, but you can go further and sculpt them to your exact tastes via a couple of different user interface screens. These screens are the “Construct” screen the “Mixer” screen.
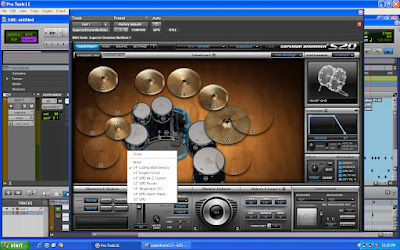 Construct screen
The “construct” screen is where you construct, or put your dream kit together. There is no shortage of drum kit pieces to choose from either, as ToonTrack has included lots of popular drum kit pieces for us all to select from. Auditioning each piece is a breeze, and it can even be done on the fly, or as the midi loops are playing back through Superior Drummer 2.0.
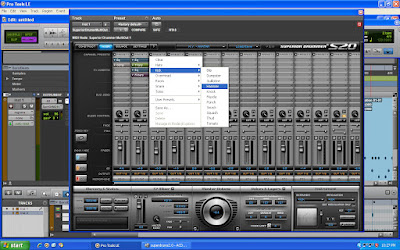 Mixer screen
The mixer screen is where you go to custom tailor the individual kit pieces sound. This works like a real mixer might, with general microphone volume sliders, custom routing of each kit piece, and the adding of effects. But it soon gets a lot deeper.
The mixer section allows for bus routing, adjustment of the direct microphones as well as above/below mics, over head mics, and you can even control the bleed of the other kit pieces into and out of the many individual microphones!
The effects are no joke either!
You can place up to five effects on each kit piece microphone (as direct in line inserts) as well as placing effects into the kit as bus routing and effect send and returns! Obtaining perfection is nothing short of a snap of the fingers!
The five included effects are supplied by Sonalksis, and they are a 5 band EQ, a Transient, a Gate, a Compressor, and a High/Low pass filter. These effects all sound better than great, and they all come loaded with preset effect settings. You can choose from an array of custom set effect presets in order to quickly get that “phat tone” out of a kit. The certain effects that are used to get that particular preset sound, with their exacting settings, are installed instantly for you as you select them!
You can even try the presets out quickly while the midi is playing, in order to settle on the one that is closest to your envisioned sound. Then you can keep the settings as they are, or you can “tweak/adjust” each individual effect to your hearts content!
I found that by using the effect presets, (great professional settings set by Sonalksis) I could dial in my dream drum kit sound in seconds flat. The mixer screen and the included effects by Sonalksis just keep making me feel warm and fuzzy way down deep inside!
So, to wrap up this review, I proudly give two thumbs way, way up to ToonTrack for yet another realistic sounding, easy to use, professional in every conceivable way, virtual drum product! Think of Superior Drummer 2.0 as your drum solution! Go out right now and get it.
Friday, September 4, 2009
ALTERNATE TUNINGS FOR GUITAR
Recently I posted an entry where I explained that I would soon post some information about alternate guitar tunings. Well, the time has come. Some time ago I wrote an Ebook that I used to sell titled "Same Day Guitar". Same Day Guitar showed people how to play the guitar on a beginers level. It contained lots of images, text, and some videos too. Since then, I have tried to share some of this information by placing it into this blog from time to time. Here is one of these times.
Alternate tunings for the guitar can be a whole other world of their own. I remember the first time I heard of these, and I was mystified. Why would anyone want to tune their guitar differently?
I will give you the coolest reason now…..THE SOUND!!!!
Alternate tunings can add a warm texture to any song, by just simply tuning a second guitar, or rhythm guitar to an alternate tuning. In fact, alternate tunings can give a song a completely different sound all together. Let’s not forget about the slide guitarists of the world or the steel guitar players of that good ole country music; for they have been tweaking their guitars tunings for as long as their music’s genres history is. All of this diversity comes from doing things just a little different. Let’s explore some of the easiest and most common alternate tunings, shall we?
The first alternate tuning I will discuss is the “open D” tuning.
This is perhaps the most commonly used open tuning in alternate rock music today. It is called “open D” tuning because you actualy tune all of the strings of a guitar to the triad of notes that make up the D chord (D, F sharp, and A). When done properly, the strings will sound a perfect D Major chord while strummed open, or without any fingers on the strings. Get it, when played open it is a “open D”.
Yes, all of the common chord fingerings will have to be altered once your guitar is alternately tuned, but there is some magic here. All major chords can be played with one finger barring all the strings on any certain fret. Usually this is done with the index finger or the middle finger.
Try setting a slide on the strings of the guitar (but do it easily because not much pressure is needed here) and “slide around for a while. Slides are inexpensive, and well worth the small cost. Slides are most often placed over the middle or ring finger of the left hand (right handed folks), and slides are placed onto the guitar strings only, and just over the fret.
At each fret a major chord will be sounded. This is a great way to add some beef to your tracks. The song "No More Tears", by Ozzy Osborne and Zack Wild is played with this beefy open D tuning. Basically, the rule of thumb is that if you can hear a slide being used on a guitar on a song, then you can bet it is tuned to an open chord tuning of some sort.
Using a capo with open tunings can add all the fun and excitement as the capo can bring on a guitar in standard tuning. If your voice is not a perfect match for (lets say) the key of “D”, a capo can quickly help to change the key of the open tuning. I know that this very thing is what capos are for, but the point here is not to limit your creative juices.
Want some more cool reasons to tune up your guitar to an open chord tuning? How about the harmonics (when a fret is strummed with a mute), when all six strings of the fifth, seventh, or twelfth fret are strummed at once, will now ring out with a major chord.
This trick has been used in too many songs to list, yet, it still sounds wonderful. One song that has this effect in it that comes to mind is “Talks to angels”, by The Black Crowes.
Now that you have the knowledge of a few things to try out, lets tune up your guitar to an open chord tuning. I will quickly detail how to tune your guitar to “open D”.
The strings are tuned as follows for an open D tuning:
Fat E string is lowered to a D
A is left alone
D is left alone
G is lowered to an F sharp
B is lowered to an A
E is lowered to a D
Here is a fun little secret. When you purchase a guitar slide it will most likely come with a rolled up piece of paper inside of it. When this roll of paper is unrolled it will reveal a ton of different open chord tunings. A lot more open tunings than you will ever need. This information, all on one piece of paper, might become very handy to you if you indeed enjoy open tunings, and the slide.
Another alternate tuning is the “drop D” tuning. This takes two seconds to do, and adds a deepness to any song that you add it to. Simply drop the low “E” down to a “D”. That’s it! A deep tone is added to a “D” open end chord. A lot of rock music that has a “chunking”, muted guitar rhythm in it gets it by using this to its full advantage. It also adds a lot of “bottom end” to any acoustic performance. In fact, Eddie Van Halen uses this tuning so much; he helped design a tremolo that quickly drops the “E” string to a “D”, with just the snap of a lever.
These are just two of the many alternate tunings that are out there, so get creative, and try some of your own! One last note to you all is this: try to translate the notes of your favorite chords into open tunings. This creates some awesome sounds and some great new riff ideas!
Alternate tunings for the guitar can be a whole other world of their own. I remember the first time I heard of these, and I was mystified. Why would anyone want to tune their guitar differently?
I will give you the coolest reason now…..THE SOUND!!!!
Alternate tunings can add a warm texture to any song, by just simply tuning a second guitar, or rhythm guitar to an alternate tuning. In fact, alternate tunings can give a song a completely different sound all together. Let’s not forget about the slide guitarists of the world or the steel guitar players of that good ole country music; for they have been tweaking their guitars tunings for as long as their music’s genres history is. All of this diversity comes from doing things just a little different. Let’s explore some of the easiest and most common alternate tunings, shall we?
The first alternate tuning I will discuss is the “open D” tuning.
This is perhaps the most commonly used open tuning in alternate rock music today. It is called “open D” tuning because you actualy tune all of the strings of a guitar to the triad of notes that make up the D chord (D, F sharp, and A). When done properly, the strings will sound a perfect D Major chord while strummed open, or without any fingers on the strings. Get it, when played open it is a “open D”.
Yes, all of the common chord fingerings will have to be altered once your guitar is alternately tuned, but there is some magic here. All major chords can be played with one finger barring all the strings on any certain fret. Usually this is done with the index finger or the middle finger.
Try setting a slide on the strings of the guitar (but do it easily because not much pressure is needed here) and “slide around for a while. Slides are inexpensive, and well worth the small cost. Slides are most often placed over the middle or ring finger of the left hand (right handed folks), and slides are placed onto the guitar strings only, and just over the fret.
At each fret a major chord will be sounded. This is a great way to add some beef to your tracks. The song "No More Tears", by Ozzy Osborne and Zack Wild is played with this beefy open D tuning. Basically, the rule of thumb is that if you can hear a slide being used on a guitar on a song, then you can bet it is tuned to an open chord tuning of some sort.
Using a capo with open tunings can add all the fun and excitement as the capo can bring on a guitar in standard tuning. If your voice is not a perfect match for (lets say) the key of “D”, a capo can quickly help to change the key of the open tuning. I know that this very thing is what capos are for, but the point here is not to limit your creative juices.
Want some more cool reasons to tune up your guitar to an open chord tuning? How about the harmonics (when a fret is strummed with a mute), when all six strings of the fifth, seventh, or twelfth fret are strummed at once, will now ring out with a major chord.
This trick has been used in too many songs to list, yet, it still sounds wonderful. One song that has this effect in it that comes to mind is “Talks to angels”, by The Black Crowes.
Now that you have the knowledge of a few things to try out, lets tune up your guitar to an open chord tuning. I will quickly detail how to tune your guitar to “open D”.
The strings are tuned as follows for an open D tuning:
Fat E string is lowered to a D
A is left alone
D is left alone
G is lowered to an F sharp
B is lowered to an A
E is lowered to a D
Here is a fun little secret. When you purchase a guitar slide it will most likely come with a rolled up piece of paper inside of it. When this roll of paper is unrolled it will reveal a ton of different open chord tunings. A lot more open tunings than you will ever need. This information, all on one piece of paper, might become very handy to you if you indeed enjoy open tunings, and the slide.
Another alternate tuning is the “drop D” tuning. This takes two seconds to do, and adds a deepness to any song that you add it to. Simply drop the low “E” down to a “D”. That’s it! A deep tone is added to a “D” open end chord. A lot of rock music that has a “chunking”, muted guitar rhythm in it gets it by using this to its full advantage. It also adds a lot of “bottom end” to any acoustic performance. In fact, Eddie Van Halen uses this tuning so much; he helped design a tremolo that quickly drops the “E” string to a “D”, with just the snap of a lever.
These are just two of the many alternate tunings that are out there, so get creative, and try some of your own! One last note to you all is this: try to translate the notes of your favorite chords into open tunings. This creates some awesome sounds and some great new riff ideas!
Friday, August 28, 2009
ToonTrack EZ Drummer 2.0 Review.

Recently I had acquired ToonTrack EZ Drummer 2.0, and have been using it for a couple of weeks straight. I have found some very good points to this package, but with my DAW version (Pro tools LE 6.8.1) I have found a work around. Here are the details.
To begin, ToonTrack is the leader in virtual drumming software.
To begin, ToonTrack is the leader in virtual drumming software.
The sound patches in their products are incredible in sound, and as close to the real thing as possible. But, if that isn’t enough for the inner songwriter in you, the good folks at ToonTrack went on and added different sections to their products. The different sections include a virtual microphone mixer and a loop browser with tons and tons of loops for us all to drag and drop into our musical creations.
Why not invite a professional drummer to play on your cuts? Some of the professional drummers that perform the hits, smashes, and loops in midi form for ToonTrack are Thomas Haake, Sterling Campbell, and NIR Z, just to name a few. These people are without a doubt the best at the style of music that they play. I just love the digital age!
The EZ DRUMMER 2.0 main kit interface.
Why not invite a professional drummer to play on your cuts? Some of the professional drummers that perform the hits, smashes, and loops in midi form for ToonTrack are Thomas Haake, Sterling Campbell, and NIR Z, just to name a few. These people are without a doubt the best at the style of music that they play. I just love the digital age!
The EZ DRUMMER 2.0 main kit interface.

Perhaps you might want to jump over to a ToonTrack EZ Drummer 2.0 video demonstration first, and then return for more of the finer details. Here is a link to the video. Be sure to click on the speaker at the lower right in order to hear the sound.
As the software plug in finishes loading (as an RTAS plug in) the user is taken to the “drum kit room page”. This screen is where the user can audition the individual drum kit pieces (snares, toms, cymbals, ect.), and the user also can interchange among the many other kit pieces from a drop down menu. Putting together your dream kit is a snap, and then it is on to the midi drum loops.
Choosing the loop that is perfect for your song is as easy as point and click. ToonTrack has created a very easy to use browser for finding and selecting the perfect loop. The user may audition loops on the fly, and then when the one for your work is located; it is only a drag and drop to completion. EZ Drummer 2.0 ships with tons and tons of loops in commonly used timings and styles.
Each loop is played in many different ways, such as with the high hat closed, open, half way, or with a ride. Each style is performed a little bit differently too, so finding a loop for the verse, and a slightly different version of that loop for the chorus is a breeze.
I (once again with my PT-LE 6.8.1) could not seem to drag and drop the loops into my tracks. However, I found a solution to that problem and I explain the fix HERE.
OK. You have found the drum loop that is just perfect for your next number one smash hit and then you placed the loop into your song. So now what?

Opening the mixer will allow the user to “fine tune” the drum loop as you want it to sound for your particular style of song. The sliders actually increase or decrease the individual microphones in volume. The microphones in EZ Drummer 2.0 are on the kick, two on the snare (above and below), tom microphones, overhead microphones, and room microphones. How is that for precise mixing? Rather amazing, if you were to ask me. I had no problem customizing my kit so that it “sat” in my mix perfectly. I found myself returning to the mixer again and again in order to tweak the microphone level settings, just to see, or hear, what would happen. I should also mention that ToonTrack has included some very impressive sounding pre-set settings in the mixer area. These settings are named “tight kit, ambient kit, basic kit, and the default kit) and they are great sounding by themselves, or perhaps you can use these settings as a starting place. Either way, it was nice to see that the folks at ToonTrack took the time to include this feature.
Adding fills with EZ Drummer 2.0 and then writing added notes with midi.
EZ Drummer 2.0 comes with tons of fills included. These loops are also midi files, and are added to your tracks with a simple drag and drop. After you audition the fills, adding the perfect one to your song is a breeze.
I found adding an extra drum hit here or there was not an issue at all. I used the Pro Tools midi tools, and added the notes where I wanted them. Believe me, it is that simple! ToonTrack EZ drummer 2.0 integrates seamlessly into Pro Tools LE 6.8.1. Way to go!
Wrap up…
Over all I found ToonTrack EZ Drummer 2.0 to be a great sounding package that was very easy to work with. The songs that I have added EZ Drummer 2.0 to sound incredible, and just like a well known professional drummer has done the percussion for me. Good bye to lame digital midi drum tracks, and a warm hello to ToonTrack EZ Drummer 2.0.
What are you waiting for? Get it!
I (once again with my PT-LE 6.8.1) could not seem to drag and drop the loops into my tracks. However, I found a solution to that problem and I explain the fix HERE.
OK. You have found the drum loop that is just perfect for your next number one smash hit and then you placed the loop into your song. So now what?
Opening the mixer will allow the user to “fine tune” the drum loop as you want it to sound for your particular style of song. The sliders actually increase or decrease the individual microphones in volume. The microphones in EZ Drummer 2.0 are on the kick, two on the snare (above and below), tom microphones, overhead microphones, and room microphones. How is that for precise mixing? Rather amazing, if you were to ask me. I had no problem customizing my kit so that it “sat” in my mix perfectly. I found myself returning to the mixer again and again in order to tweak the microphone level settings, just to see, or hear, what would happen. I should also mention that ToonTrack has included some very impressive sounding pre-set settings in the mixer area. These settings are named “tight kit, ambient kit, basic kit, and the default kit) and they are great sounding by themselves, or perhaps you can use these settings as a starting place. Either way, it was nice to see that the folks at ToonTrack took the time to include this feature.
Adding fills with EZ Drummer 2.0 and then writing added notes with midi.
EZ Drummer 2.0 comes with tons of fills included. These loops are also midi files, and are added to your tracks with a simple drag and drop. After you audition the fills, adding the perfect one to your song is a breeze.
I found adding an extra drum hit here or there was not an issue at all. I used the Pro Tools midi tools, and added the notes where I wanted them. Believe me, it is that simple! ToonTrack EZ drummer 2.0 integrates seamlessly into Pro Tools LE 6.8.1. Way to go!
Wrap up…
Over all I found ToonTrack EZ Drummer 2.0 to be a great sounding package that was very easy to work with. The songs that I have added EZ Drummer 2.0 to sound incredible, and just like a well known professional drummer has done the percussion for me. Good bye to lame digital midi drum tracks, and a warm hello to ToonTrack EZ Drummer 2.0.
What are you waiting for? Get it!
Subscribe to:
Posts (Atom)