Monday, February 28, 2011

Groove 3, “Mixing Rock ”......O.M.G.!!!!!


Let me tell you where you can go to “get your learn on”, find those loops that you need, or find some fun and cool apparel...... Groove 3

Groove 3 has a ton of great training videos, for musicians of all types, and all of which are top, top, top quality!! These training videos cover lots of topics such as some of the most commonly used DAW's, all sorts of plug ins (from Superior Drummer 2.0 and Auto tune , IK Multimedia plugs, right on down to Waves Plug ins, and even Melodyne), and also production, recording, and mixing videos. Heck, they also sell loops and even T-shirts too!

Introducing “Mixing Rock”, from Groove 3. But what is it, and what is included?


A training video, as taught by Multi-Platinum Engineer and Producer Kenny Gioia.


Mixing Rock contains 37 video training tutorials, with almost 7 hours total run time!!!!!!!!!

Mixing Rock is great for the beginner to intermediate producers and engineers.

Mixing Rock viewing Options: Online, Download, Boxed Disc, and iDevices.

Mixing Rock ” is broken up into “categories”. It is almost laid out as a book might be, and in a perfect working order. The list of categories goes like this:

Introduction

Organize the session

Groups, Busses, and Effects

Technical issues

Basic Vocal/ Drum mix

Bass and keys


Guitars

Piano and mutes


Final vocal mix


Automation and final mix


Each “category” contains video titles underneath of itself. For example, under the category of “Organize the session”, the different training video choices are:

Markers

Track naming

Color coding

Track clean up

Re-Ordering tracks


I have been watching, no, scratch that..... I have been learning a lot as of late. I have been absolutely engrossed in these training videos, and just let me add that for all types of musical know how, Groove 3 is the place to be. The quality of the training videos found there is simply amazing, and the content is wonderful, and jam packed too!
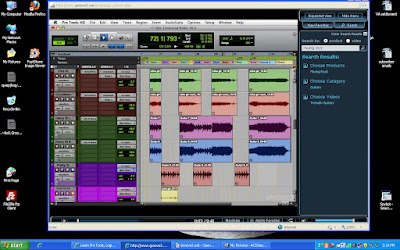
Have you ever wanted to stand behind a rock and roll mixing engineer, and have him explain clearly each and every process as he mixes a song? If so, Mixing Rock is the training video to get.


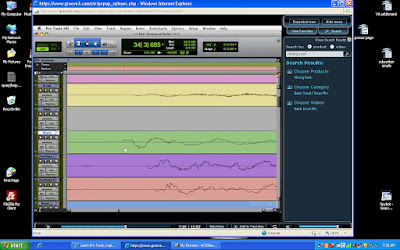
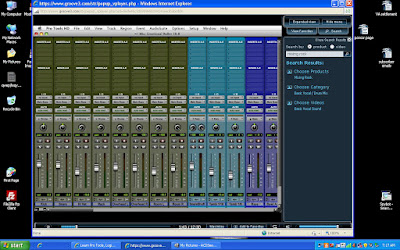
It is all very well laid out. In fact, it is shot just as Kenny Gioia likes to work through a song mixing session.


Mixing Rock starts with a likely scenario. A mixing engineer (possibly you) gets a song emailed to him from a recording studio that needs to be mixed. Kenny Gioia , then, starts to work. Work begins by “setting it up” in Pro Tools. Learn how to quickly figure out just what is happening in a song, how to label the tracks so that you know what and where they are, and when and where to add some basic panning and volume adjustment.

As a note, I picked something very cool up from the very first video. Right from the start you learn just how important the “quick” keyboard shortcuts are. Making your work as fast and as easy for yourself as possible seems to be the name of the game here. Don't miss-read this, the pace is not too fast for the viewer to catch on, but, instead, Kenny Gioia shows you how to get around your mixes quickly. Weather mixing is a career or a hobby, you will want to make routine edits as fast as possible.

Kenny Gioia speaks as he works. I became completely engrossed in the Groove 3 training videos for this very reason. What am I learning? Well, Kenny Gioia actually tosses in a lot of extra information about just what it is he is adjusting, how it is done, and why he is doing it. Very well done! I am learning a lot of time saving tips, or new and quicker ways to edit my tracks. I am learning how to properly pan my tracks in order to get a nice, full, and exciting mix. I am learning to use busses and sends while mixing, just to make life a lot easier. I am sure that if you spend your days mixing songs as a profession, then speed is your friend. I do not spend my days just mixing, but I will now use these tricks to both speed up my work flow, and make life easier and less confusing while mixing.

Things started to change for me by the fourth video. I was starting to learn bigger things, things that I have been doing myself, but just not as well as I could have been doing them. I learned a lot about using templates, effect sends and returns, and even about the “solo safe” trick found in Pro Tools. Let's not forget all of the things that I did not know too, like the pre/post fader tips that I learned in this one single video. This is all very big for me, as I need to squeeze every bit of power out of my software, and into my mixes! This alone was worth the price of Groove 3Mixing Rock ”.

I thought that I knew a lot about using, or creative application of effects. I was wrong. I have now (since watching “Mixing Rock ”) learned four times what I had ever known before. Kenny Gioia is a master of his craft. Not only does he know how to make great effects loops, but he shows the viewer how to make the best effect loops by just being creative with your DAW's features. Brilliant stuff here. This is what separates “Mixing Rock ” from any other training video that I have ever watched.
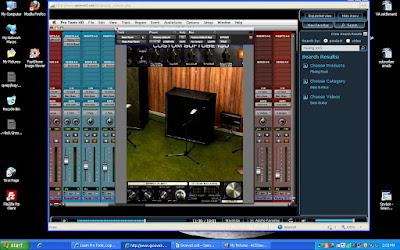
I get a lot of compression questions here at the Home Recording Weekly blog. I like to think that I have compressors understood, and I still think that I do. However, I learned how to use all types of compression while watching “Mixing Rock ”, as well as how to use multiband compression, and all in order to get that polished professional sound that we all want so badly. This video will take some re-watching, but that is the best part about Groove 3 training videos, and Mixing Rock , you can watch them all again and again.
This sort of intense learning continues on and on, as you continue on with the videos in Mixing Rock. Some of the ongoing topics range from timing issues, and fixing timing issues using elastic audio, and all about fixing them in multi mic'd sessions mind you! Tuning minor vocal issues are addressed, and in the spirit of teaching, the great tips continue. Through out these videos, Kenny Gioia not only opens up most of his favorite plug ins to enhance and/or fix tracks, but he delivers some very solid tips on some of the most commonly used plug inns. Plug ins that we probably all have, or we all have access to. Little tips, and great big tips alike, and these are the things that make Mixing Rock shine.

Kenny Gioia explains why he mixes the way that he does. He mixes the main vocal first, and then he jumps on to the drums. This particular mixing order never made sense to me, but Kenny explained just why he does this, and now I will do it his way too. It is all about getting a great, “matching space environment” sort of feel, and he gets it that way with you looking over his shoulder. Thanks so much Kenny Gioia!!!

Overall, besides learning more than I thought ever existed, Kenny Gioia shows us how to get every single ounce of sound and tone out of our tracks by using every trick and every plug in that he likes to use. He uses and teaches us how to apply sends, returns, tracks of all types, buss tracks, groups, fades, Elastic Audio, all sorts of effects from echo to ping pong delays, delay compensation, Transient modulators, EQ's, EQ's that act as Gates, Compressors, panning, low and high pass filters on EQ's, and just about everything else that you can (or can not) think of.


Kenny Gioia sets up his effects as a template, which I found interesting. He explains why he chooses to do things this way, and then continues on mixing. This comes back and makes perfect sense towards the end of the Mixing Rock training videos, as he automates the effects with us. So, if you don't think things should be done this way, just sit back and let Kenny Gioia show you how, and why he does it like he does.


Not only does Kenny Gioia add the “sonic magic”, but he demonstrates the techniques he has learned along the way as he works. He “tunes us in” to how we can achieve tight, and right sounding tracks using modest effect levels. I loved watching Mixing Rock the first time through, and I will continue to love it as I watch it again and again. I want all of this precious information to stick in my mind!


Some things that I have never done, but now feel confident doing are applying parallel bus compression, adding drum hit samples to multi mic'd drum sessions, using delay compensation, and writing automation. What an incredible look into a great rock mixing session! I really enjoyed learning how Kenny Gioia uses automation to make a song “Breathe”, or to come alive. Kenny Gioia also details the many different ways that he writes automation, which I needed to see. I use automation, sure, but just not as creatively as Kenny Gioia does. I will from now on though!


Here is the bottom line...... Groove 3 has a whole inventory of amazing training videos. A lot of “learning” mixing engineers, right down to hobbyist folks just like You and I, can learn a lot from watching Mixing Rock . The training video is the best way to learn, in my humble opinion, well, other than being able to actually be there and ask questions. The video and the audio quality is top shelf, and the price is very low. You get a whole lot of incredible information, from a professional (Kenny Gioia), for a low price. What could be better?


Last of all, if you can't decide which items you want, or you are like me and want them all, you might want to opt for a subscription, in the form of an “All acess webb pass” from Groove 3 . All acess webb pass start at just 29.99 for a full 30 days! How much could you learn in 30 days? A lot!


Wednesday, February 23, 2011

Subtractive EQ practices, High and low pass filters.

This post is meant for the person that has some great songs recorded, and is looking to apply some better EQ prior to mastering their new song. I hope you enjoy this post, and if you do, please let me know about it. I will post more of these types of posts if folks like them.


These days, I get a lot of folks visiting this blog, and quite a few are looking for information about “additive and subtractive EQ procedures”. Today I would like to discuss some subtractive EQ procedure examples, focusing on High and Low Pass Filters.


But before I get too far into High and Low Pass Filters, let me stray off the beaten path for a moment, and give you some great advice. You can't put lipstick on a pig. Yep, that's right. That saying means that if your song is poorly recorded, then no amount of EQ will make it sound good. Go back now, and re-record those troubled tracks. A bad take is a bad take. I know because I have tried to “polish a turd” before, and it still looked like a turd.


Now that those harsh words were typed, let us get on with a quick lesson on frequency metering. “Why?”, you ask... Well, you can't remove any unwanted frequencies unless you know where they are located. I am not talking about a tracks gain level meter, or a master faders' gain meter, but a frequency meter.


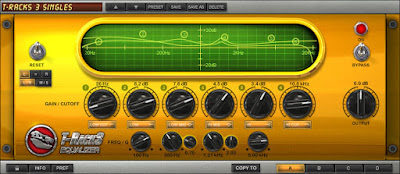
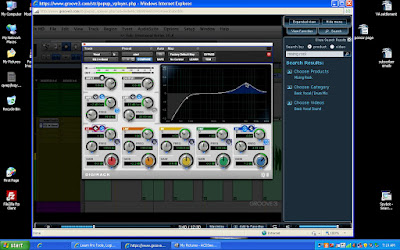
IK Multimedia T-Racks S3 deluxe freq. meter


Placing a frequency meter across a single track shows just exactly what is happening, sonically, within that track. The frequencies (on most frequency meters) are laid out from left (lower frequencies), to right (higher frequencies). The more of a particular frequency present within a track, the more “bars” will be present in that section of the frequency meter. This has little to do with measuring a tracks' “gain” or “volume”, but, instead, measuring just where, and how much of each frequency are present within the track or tracks.


Another great idea is to put a frequency meter across a master fader. Solo each track to make additive or subtractive adjustments, and then “bring in” the other tracks, one at a time. Continue to watch the meter as you “un-solo” the tracks, and keep a sharp eye on just what is happening within the meter. Notice which tracks bring in that unwanted frequency boost. Which tracks, when played together, seem to send the levels “into the red”, so to speak. This is the best way to analyze the bass and a kick, together and separate, within your songs. This method also makes getting a great overall mix a snap.


First up, the High Pass Filter...


Let me be the first to tell you that a High Pass Filter is often called a Low Cut Filter. A Low Pass Filter is also called a High Cut Filter. These are examples of calling the same thing a different name. Let me explain why, as I detail what all of these filters are.


OK, let's say that today you are tracking a new song, consisting of 4 tracks, and all with just one microphone. The first track is a drum kit. The second is a guitar. The third track is a bass. The final track is a vocal track. Short and sweet, right?


However, without you even noticing, your neighbor is mowing the lawn today. There seems to be a motorcycle pass by your house every half hour too. Plus, you can't hear it, but passing trucks keep on hitting the same pot hole, and all of this creates some awful low end energy. Track after track, this low end frequency energy (or information) builds up, until the song is finished. Each track solo'd seems fine, but when played all together the low end just sounds muddy. This is from the build up of low end frequencies within your tracks.


What can you do to help avoid all of this? Simple! How about using High Pass Filters on each of your tracks?


But what is a High Pass Filter?

High Pass Filters work on a simple premise. Basically, a High Pass Filter lets only the high frequency information pass through the filter un-touched. The low frequency information, however, is not allowed to pass through the filter. You tell, or set the filter to start cutting back at a particular “cut off” frequency. All that you need to do is to “tell” the High Pass Filter what this “cut off” frequency is. Then, all of the sound information higher than this setting (or cut off frequency) passes through the filter, and all of the sound information below this cut off frequency is cut. By the way, most of the low end rumble that we all cut out of out tracks can not be heard with our ears (roughly below about 20HZ or so). However, it adds up with each track and before long it begins to sound like “do-do”.


There is no particular “magic setting” for using High Pass Filters on your tracks. Each track is different! My advice is to start at the lowest “cut off” setting (so that the filter is not even working) and slowly move it up, until it sounds as you want it to. Solo the track as you do this, but make sure to bring in each of the other tracks, one by one, just to make sure that it still sits well in the mix. Know exactly what information you are removing. Study your tracks' frequencies with a meter: both before, and as you adjust the High Pass Filter. Solo the track as you adjust the settings of the High Pass Filter, but un-solo it just to double check that it sits right with all of the other tracks in your mix.


Using High Pass Filters has become a “must do” with me, as long as the track was recorded with a microphone. A lot of other instruments could benefit from High Pass Filters too, like bass, guitar, and snares. Problem is, too much High Pass Filter can be bad.


This brings me to the next topic for this post, the Low Pass Filter. Just think what the opposite of a High Pass Filter would be, and that is a Low Pass Filter. The idea, here, is to get rid of any unwanted, and pesky, high frequency audio. These high frequencies can certainly add up to spell disaster too, even perhaps more noticeably than low energy audio can. Tracks with “too much high frequencies” can sound distorted, or “tin like” and will just sound un-professional.


Once more, almost any track can be a good candidate for a Low Pass Filter. Most often I place a Low Pass Filter across acoustic guitar tracks, piano tracks, vocal tracks, and lots of other tracks too. The repeated truth, here, is that independently each track might sound rather acceptable. But, as each track that has too much high end adds up, what you will have is treble distortion!


I know this because I did this time and time again! I would blame the distortion on an over EQ'd hi hat, and then re-eq the hats. But once I played the freshly eq'd song the distortion was still there! Then I went through and listened to each track solo'd, but I just could not find the culprit. Sure enough, as I un-solo'd the track, I would hear it happening. What was going on?


The answer was that I was looking for was to add a simple Low Pass Filter to each of the tracks. This not only fixed the problem, but it even added some high end clarity. How, you ask? Well, without the distortion on the high end of things, the high end could now be heard more clearly.


So, what is the magic frequency that one should set the Low Pass Filter to “cut off” at (or start working at)? Well, I do not know. Each track, just as each song, is different.


With the track solo'd, I start at the highest frequency setting for the low pass filter, and then slowly start working it down. Once it sounds perfect, I stop. Next, I add in other “like tracks” one by one, to check that it still sounds good. Next, I like to add the other tracks and make sure it still works in the mix. Keep in mind that “like tracks” (like acoustic guitars for example), can have an additive eq effect when recorded with the same microphone, and so bringing them in first is a good idea.


Thanks for stopping by the Home Recording Weekly blog. Your input matters here, so please leave it here. You might also want to head over to my YouTube channel and check out some of my other video posts. Subscribing to the Home Recording Weekly blog is another great idea, as missing out on cool demos and reviews just sucks!

Tuesday, February 22, 2011

KRK KNS 8400 Headphone review

If you can not afford a pair of mixing studio monitors, or if you can not have a “loud mixing set up”, then here is your solution! KRK KNS8400 Studio Headphones.


I have a “nice” pair of headphones that I use to record and mix with. I paid quite a bit of money for these headphones because I wanted a pair of headphones that gave an honest rendering of my music, as I laid tracks down. The headphones' manufacturer claimed that these were perfect for “exact representation” of studio editing and mixing use, but that is far from what I got. These “expensive” studio headphones give a more “flattered” representation of the tracks. As recording musicians, we do not want a flattering representation at all. We need to keep things as exact as we can. If we don't have things as they really are then we get mixes that just do not sound right as we continue laying tracks on top.

I solved this problem, some time ago, by getting a great pair of monitors. I got a pair of the KRK Rockit 8 G2's, and I was now in “exact representation world”. These monitors give a very exact representation of just what we have tracked. But, once again, a problem popped up. I can't record late at night, or with others in my living space, at least not with the KRK's thumping! So, back to the headphone search....


The KRK brand is known for exact representation of recorded music, no matter the KRK product. How could their headphones be any different? Come to find out, their headphones match quite nicely to their monitors! What I hear through the Rockit 8 G2's is very close to what I hear through the KRK KNS8400 Studio Headphones! In fact, it is extremely close to the same! This is so very important to me, just so that my mixes remain consistent. But this isn't the only reason you need to get a pair of the new KRK KNS8400 Studio Headphoness. Nope, check this out....
Just like you, while recording music, I keep headphones on for hours at a time. The problems that come along with this sort of "long duration of use" are profuse sweating of the ears, the uncomfortable feeling that comes from wearing bulky and heavy studio headphones, and lastly, ear fatigue. So, how do the KRK KNS8400 Studio Headphones compete with others when it comes to these issues? Well, with these issues in mind, let me tell you that the KRK KNS8400 Studio Headphones rock!!!


I have to say that comfort wise, when they are on my head they feel like just air! A lot of attention, in the design, went to the comfort of the wearer of these great headphones! The ear cups are not plastic, and do not “sweat” like my other expensive pair of “studio” headphones do.


The KRK KNS8400 Studio Headphonesare snug, but not bothersome or bulky at all. They do not get in the way, and they seem to be right on, weight wise, just so that we know that they are actually on our heads. Ever try to answer the phone with your headphones on? I have, and you might do those sorts of things with the KRK KNS8400 Studio Headphoneson your head. That is a good thing.

Let's talk about another very important, and perhaps the most important, quality that recording studio headphones need. That is isolation.

My other “expensive” studio headphones, that I used to wear, promised great isolation properties. But still, the music coming through them could be heard bleeding into every track that I used them on, well, as long as a mic was in use. The headphones just could not “hold back” the backing tracks that I need in order to record other parts. With every track, the backing parts, along with a “live” mics' information, could be heard. Simply put, I could always hear the music coming from the headphones bleeding into the microphone, and then into the tracks. The KRK KNS8400 Studio Headphones do not leak like that at all! With an ISO value (isolation ability) of up to 30 DBA, these will not leak into your tracks. So long irritating leakage!!!
So, what are you waiting for? Go out and get these great sounding studio headphones! They are actually reasonably priced, and can be used for all types of listening! They shine in the studio, but are great for Ipods and whatever you need great headphones for.

Here is a great video, from KRK, featuring the KRK KNS8400 Studio Headphones


Wednesday, February 16, 2011

Using Gates for obtaining better audio.

Gates (also known as noise gates) are yet another handy tool for removing unwanted noises in our audio. Gates usually are “set” to activate, or engage, much like a compressor or a limiter might, once a certain “threshold” of signal is reached.

Let's try to keep it very simple, and think of a gate as a simple on/off switch. Like a simple toggle switch, this switch is either “on” or it is “off”. This switches' normal state is “off”, and when it is “off” it does not allow any audio signal to pass through it. When this switch is turned to “on”, audio passes through it. Once our audio signal reaches a particular level, or “threshold”, our switch turns itself to the “on” position. While this switch is “on”, it allows audio to pass through it. This switch also has a threshold dial, but I could not work that into my “simple switch theory”. But, this is how a noise gate works...... well, somewhat.


As I stated above, our audio signal had to reach a particular level, or “threshold”, in order to turn it self to the “on” position. Some gates react to certain frequencies, instead of volume levels. Make sure that you are aware of what type of gate it is that you are using.


This simple gate, in the image, is either letting audio through it, or no audio at all. What happens when we set the “threshold” to just above a breath level? You guessed it! No audio will pass on through the gate, and on into the amp and speakers. But, when the signal reaches above a breath, the audio passes through the gate. This is handy for a vocalists microphone, as the breaths will not be heard, but the singing will pass through the gate, and be heard by all.


Gates usually are used with one primary function in mind. That function is to rid a track of some “unwanted noise”, weather that noise is direct or via a microphones' bleed. For example, how about a microphone placed inside a kick drum that bleeds in the snare. This might make for trouble when recording the entire kit. Gates are used when recording, after a track has been recorded, and in live situations too!


Here is a cool video that demonstrates a gate, in action, reducing unwanted mic bleed. You see, the other drum kit pieces are entering this particular microphone, and putting a gate across the mic input sort of deletes this “un-wanted” mic bleed.


Getting deeper into gates......


You see, setting the threshold, to the exact frequencies where the other kit pieces are bleeding into the track, and then cutting it back can make them almost disappear.


However, this is not the only use for gates. Another, and very creative use for a gate is to “turn on” an effect, or a series of effects, once a certain threshold is reached. This could be set up to add reverbs, delays, or compressors to a vocal, but only at a precise volume level, and higher. This gate is set up in a “parallel” type of arrangement. This means that the main signal is always heard, and the (gated) “effected signal” is added to the main signal, but only once the gates' threshold is reached. Once the level of the main signal is lowered back down, below the threshold, the (gate) effects are turned off.

This very thing can be heard in action on a lot of well recorded, live acoustic performances. For example, an accoustic version of RadioHeads “Karma Police”, as performed by Howie Day, has this type of parallel gate effect.....well at least I think it sounds as if it does. Once Howie gets to the chorus, the vocals hit that threshold, the gate opens, and the effected signal joins the overall mix. But once that particular loud lyric part is over, the vocal is returned back to an “un effected” signal. This trick is great if you are performing without a sound person manning the mixing console. There is also a great looping pedal performance at the ending of the song that is worth checking out.

If you have done this very trick with gates before, then please let me know about it. Write me an email, or simply post the information on this blog post! I would love to hear all about it!

Monday, February 7, 2011

Toontrack Rock Song midi pack

I love to write music.

Usually just a certain riff from the guitar or some chord progression from the piano catches my attention, and then blossoms. Then, as I try to get to sleep, it takes shape in my head. But, by the time I should be fast asleep, the song has a verse, chorus, bridge, and some rough vocal ideas. So, pushing sleep aside, I get up and start to record it before it is gone forever.


It comes in waves for me.


Sometimes the process of putting a song togather is painfully slow, sometimes it is blazingly fast. Sometimes it is as if I can't get one part down before the next part is perfected in my head, and it too will need to get recorded or it too will be lost. Yet, at other times, the next piece of the puzzle just will not go into place. No matter what I try, it just does not fit. Sometimes it is a bass line that fights with me, but most of the time it is a solid drum score that eludes me.


I love being able to audition drum lines using midi drum libraries. I can't always find that “perfect line of midi”, if there is such a thing, but I can usually get very close. I can always go back and move midi notes around, like moving a snare hit to a rim hit. I can also chop up the midi information to make things fit better. So, let me introduce what has become my favorite midi file library to start my search in.


Rock Songs, from Toontrack, is the songwriters dream. As taken from an email that Toontrack sent out, “Rock Songs midi pack, Played by Swedish powerhouse drummer Owe Lingvall...... Rock Songs MIDI pack comes stocked with a variety of songs in different feels, styles and tempos. Part from the individual, full 4-8 bar song structure building blocks (verse, pre chorus, chorus, bridge, fill etc.), it also includes each entire performance from start to finish as a Jamtrack, which means you can fire that up and jam along to the original take right away.”


Let me elaborate some more, and explain what I like about Rock Songs midi pack. I like that it is set up as songs are. You can quickly and easily select from different “variations” of the same part, for the verse, chorus, and so on. This is what makes finding that particular sound fast. Perhaps verse two needs some more cymbal work, or more toms, or some off the cuff snare hits.....it is all in here! Customizing the midi is a snap, and before you know it, a song is born! Top it off with a nice selection of fills, taken right from Rock Songs midi pack, and it is done!


Rock Songs contains the following.....


Approximately 450 individually played files


Full intro / verse / pre-chorus / chorus / bridge / fill sections & variations


Full Jamtrack of each song performance


Ballad / Halftime / Midtempo / Uptempo / Shuffle variations


With a price of only 29 Dollars, what else are you waiting for? Go get it!

Wednesday, February 2, 2011

Bias SoundSoap2 product review and demo.

Need a way to remove those pesky “pops” and “crackles” from your vinyl records as you record and chop it up to make your new loops? Looking for an easy way to clean up the noise that your video camera makes as you record videos for YouTube? How about a way of removing your guitars' single coil hum from your tracks? Here is the easiest way to do these tasks, plus so much more!


Bias SoundSoap2 is very helpful, and a very useful tool if you record sound at home. It can be used as a stand alone unit, VST, and as RTAS, or as a “plug in” right within your DAW.


In my own case, I use it to clean up any and all unwanted audio noise from my tracks, within my songs. However, if you are making movies that contain some bad audio noise, SoundSoap2 can be a blessing for that too! Trust me, I use it for that also! My video recorder is not the best one to be using.


Ground hum, broadband noise, electrical pops, and crackles can ruin an otherwise great take, and/or a great recording. I can't count the times that a record players' constant crackle has left a potential loop useless. How about the times when the hum that a single coil bass/guitar pickup makes simply drains the enjoyment out of a cool lick? Well, no more! I have a new weapon in my arsenal, and it is SoundSoap2!!!


One very handy thing about SoundSoap2 is the many ways in which it can be used or applied. When it is applied across master faders in your DAW, or music software, it can clean up all of the tracks togather, nicely. When it is active on a single track, all by itself, it can clean up any unruly audio for that track. Bias SoundSoap2 can work in “stand alone mode” too. I use it in stand alone mode when I need to clean up my movie audio files. Yupper, using SoundSoap2 makes audio clean up a snap.

If you need to “get deeper” with your noise reduction, and simply need a more refined tool for removing your unwanted noise, then I must tell you that Bias makes a SoundSoap 2 Pro. This monster is more adjustable, with tons of different parameters for you to tweak. Keep a sharp eye out for a review/demo post/video covering the Bias Pro version of SoundSoap2.


If you have the tools to record songs, or videos, and you are less than pleased with your finished audio, then take it to a professional level with Bias SoundSoap2 .


You can get a free 14 day trial of Bias SoundSoap2, just by following this link.