Friday, June 1, 2012

We have moved, and a podcast!

That is right, we have moved, and the Home Recording Podcast now is up!
Home Recording Weekly has moved over to a new website. Here is the cool new "about me page". The new site link is Home Recording Weekly blog, or www.HomeRecordingWeekly.com , and the move was simply to serve you all better.
We needed to re-locate, and decided a new and fresh look was needed too. We needed more pages just to hold all of the new and exciting pages that are coming to you! The first episode of The Home Recording Podcast is up, on the new website, and ITunes is working hard to provide you with a "podcast catcher" too. I will have to announce when it goes live, on Itunes!
Thanks to everyone that has been with us over the years, here on blogger. I have changed things up so many times, and it still just looked like a blogger template. Well, I hope those days are over now.
Please, add the new website to your favorites tab, and check it often. You will not want to miss the next post over there! Big news is coming very soon. This news will also be posted in a brand new video, so look out for that on YouTube, and the new website too!

Wednesday, May 16, 2012

Is the most important gear that we have telling us lies?


The most important gear that we all have are our ears. Maybe they don't lie to us, but they will misrepresent the truth. The longer we listen to a particular mix, the worse our ears will distort the truth. What does this mean? Well here is an example, and what we can do to achieve better mixes.

First, as we start to mix a song, we listen very close to certain tracks, perhaps one or two at a time. As we bring in other tracks, we tend to not "hear" the former tracks as much. Often times things will start to come together, in our minds, when they are not together at all. Sometimes, when we spend a great deal of time on a mix, and then bounce it down for listening in another system, we stand in shock as it just sounds bad. How can this be?

 Well, it is our ears playing tricks on us. The good news is that this very thing happens to all of us, so you are not alone. The great news is that we can help our mixes get better and better by simply doing a few different things as we mix.

First of all, with the passing of time, we will learn our monitors and headphones. Every system adds to or takes away from certain frequencies. We should pay attention to the mix, as we play it back in our DAW's and as we play it back on other systems. What is different? What is missing, and what is too much, in frequencies, and volume too? Learning what our monitors and headphones take away, or add too, a mix is very important. This comes with time.

Next, as much as you love to spend great lengths of time mixing, take more breaks. I can't list the number of times that after taking a quick break, I have heard a glaring issue that I had missed before the break! We create an environment, an illusion, as we sit in our mixing environment, and things just sound different in the rest of the world. So, get up from time to time, stretch your legs, and rest your ears.

Next, as much as I had heard this next idea, over and over, it wasn't until recently that I implemented it into my mixing routine. Because of this next idea, massive changes have come to see the light of day. Bring a reference track into your mix! This is as simple as importing a song, that you know forward and backwards, and of the same genre as the song that you are mixing, onto a stereo track, in your mix. I like to bring in a song that is off a CD, and it has been mastered as well. Solo the reference track, and listen to the EQ, the loudness of the bass and drums, and "re-set your ears". Then, listen to your mix.

 Wow, now your mix sounds completely different! What a way to bring your mix to the next level. This step alone will save you so much time and hassle, and you will soon forget all of those trips out to the car and back just to check the mixes that you are constantly mixing again and again. Believe me, my mistakes are here to save you time and frustration! Take advantage of this stuff, please!

Lastly, mixing at a loud volume will cause you a lot of trouble. There is a famous rule, called the Fletcher-Munson Curve, that deals with this very issue. The issue is that the louder a mix, the more "volume" is applied to certain frequencies. So, the louder a mix, the louder the bass, let's say. So, you turn down the bass to make up for it, and then you make a bounce. When you listen to the bounce elsewhere, the bass is gone. Turn down your mixes, and listen critically.

These are not my ideas. I have not done the studies that prove all of this stuff. I like to listen to people that know more than I do, and learn from them. One person that has recently said most of this stuff is Graham Cochrane, from "The Simply Recording Podcast", and on the pages of "The Recording Revolution" website. He does the podcast with Joe Gilder, and his website, "Home Studio Corner", is packed with great information too.

Sunday, May 6, 2012

JamUp Jam Plug and JamUp App from Positive Grid.


Playing and practicing the guitar has never been as easy as it is with the technology that exists. We can use any IOS device (IPhone, IPad, IPOD Touch) to get amazing tones now, thanks to products like the JamUp plug (19.99 U.S), JamUp Lite (free), and JamUp Pro (9.99), all of which are from Positive Grid.


 This technology just makes one want to forget those things that we used to use when practicing, uuuummmmmm, oh yea, guitar amps and effect pedals. I love the freedom that practicing on the couch brings me, and there is a lot to be said about the whole "noiseless factor" while headphones are in use. I know my wife likes that part of the equation anyway With a back injury too boot, I don't mind lifting my IPhone from place to place, about the house, where my amps......., well, not so much.

This is a review of the JamUp plug, JamUp Pro app on the IPhone. Let me just say that if you must choose one app and one adaptor for your guitar, let the JamUp plug and JamUp Pro be the ones! I am giving this little package the "both thumbs way up" seal of approval! I am really taken back by the tones that are coming out of this app! JamUp Pro rocks! Don't miss read this, the JamUp Lite rocks too, and it is free!

If you do not see the video, below, please head over to WWW.HomeRecordingWeekly.com to watch. Some subscribers may not see it as email.


The JamUp plug  is elegant and yet simple in design, but the real star here is the JamUp Pro app, due to the solid workings of the app, the amazing tones from the amp models and effects, and the extremely low latency. So many apps of this type suffer from latency issues. This is just not the case with the JamUp Lite and the JamUp Pro versions of the app. In fact, I can't detect it at all, even though I know it must exist, since a chip is in use.

The JamUp plug works with a lot of the other guitar apps out there, (Apogee JAM, Alesis IO Dock, Line 6 Mobile In, Griffin Technology StudioConnect, IK Multimedia iRig, Peavey AmpKit Link, PocketLabWorks iRiffPort) but why not stick with the folks from Positive Grid, and use it with JamUp Lite or JamUp Pro? After all, they should work hand in hand, right?

I just love it when companies go the extra yard, and put some thought into a products packaging design. The JamUp plug comes in a very cool tri-fold package with graphics on all available real estate, and a nice black felt holder for the JamUp plug itself. Positive Grid gets extra props from me due to the fact that they didn't just toss the JamUp plug in a vacuum formed plastic bubble. I know that this will not make the product function any better, but you just get the feeling that Positive Grid is proud of there JamUp plug. The extra touches are not lost with me.


As taken from the Positive Grid, website......

"JamUp™ Lite is a Multi-Effect Guitar App for iPad, iPhone and iPod Touch. Powered by the newly developed multi-stage modeling engine, JamUp™ Lite provides authentic tone, sound-on-sound phrase sampler and incredible jamming experience.

It supports up to 5 simultaneous amps and effects through an easy drag and drop signal path, which also allows easy arrangement for pre and post effect position. There’s no digging through menus, no learning process and no hassles.

JamUp is born with great “play alone” capabilities. The phrase sampler can capture loops and riffs and create sound-on-sound overdubs. It’s the easiest way to create a one-person-band sound in minutes. And with the time stretching iTunes player, users can not only play alone with any track from their iTunes library, but also can create a loop and slow it down for further study."

I have taken a name from the contest, and declared a winner for the JamUp Jam Plug, and I have made contact with them. Congrats, and thanks to everyone that had entered! I love it when people "like" the blogs' FaceBook page. I check out everyone that "Likes" me there. Please help me grow, and let others know that I am online, and on FaceBook. Share any post that you feel is worthy!

Make sure to subscribe to the Home Recording Weekly blog, by simply putting your email in the box, over on the top and the right of this page. Make sure you "like" me on FaceBook, just so that I can "see" who you are! I thank everyone that has found me thus far, and it has been very cool "meeting all of you". We are building a small army of audio nuts, one "like" at a time!


Tuesday, May 1, 2012

Free JamUp plug

Would you like to have a free JamUp plug?

I am giving one away, in efforts to help promote the demo/review post and video that I will be putting up very soon. Click here to learn more about the JamUp plug, the JamUp apps, and Positive Grid.

No strings attached, but here are the hoops that you must jump thru in order to win it...........

 Find the Home Recording Weekly blog page, over on FaceBook, and "like" me, if you have not done so already. Next, head over to the JamUp FaceBook page, and "like" that too. On the day that the video goes live, right here on The Home Recording Weekly blog, I will pull one of those names out of a hat. I will then post the winner on FaceBook, just to let you know that you are the winner, and you will have to drop me a line. Do not worry about postage, because "its all good". You can download the JamUp lite app, which is free, to rock out anytime and anyplace!.

Just trying to make someone's day a little bit better, that's all! Good luck to all.

Tuesday, April 24, 2012

Sound isolation as treatment

We have all heard about treating rooms for audio mixing. But what about treating our spaces for Isolation, or sound that leaks in from outside our rooms? Using Hyper Cardioid, dynamic mics can help reject a lot of this unwanted noise, but noise is persistent! There is only so much that off axis rejection in microphones can do.

Case in point....

 I have a room that I just adore. It is more like a music nook, but there are some issues. From time to time I have some outside noise distracting me. Since there is a window in my room, I do get some spillage. A lawnmower, perhaps a loud motorcycle, and lets not overlook the car horns from afar, all seep in and take my mind away from the task at hand. I like to record with microphones, quite a bit, and I can't have unwanted noise creeping in to my audio. Recently, I had to re-track a speaker due to a loud motorcycle "reving" up as it passed by. I missed it as we tracked, but it was obvious as we listened back to it.

Without getting into treating this space for frequency and reflections, I needed to try and remove some of the sounds from everyday life. I plan on recording my podcast in here, and this room is off of our living space too! I do not want to record only after 10 P.M. folks, I need ISOLATION first! Once I get my space a little more quiet, I will tackle treating it for mixing. So, how can we tackle the problem of sounds entering our rooms from the world at large?


Here is one simple, and elegant way to accomplish this task. I obtained some Audimute panels from an ad on Craigslist. I was really comprehensive about how good of a job it would do, but I had to do something! So, the day it went up, I knew it was the right way to go. I hung two sheets or panels up in the open doorway that leads into my space. Immediately, I noticed a very big difference! Gone were any trace of echoes. Gone was 75 percent of the common "House noises" than can enter into a microphone. I love how "dead" the room is now, and I think that the material looks great. The real test was to happen at 4 P.M., as my wife came home.


She does not have the same eye that I have. I like to see racks of mixing gear, monitors, speaker cabs, guitars and guitar amps, mic stands, and drum risers. The Audimute panels look sexy to me. My wife remained silent about the looks. So, the Audimute panels passed the first test. The next thing that my wife noticed was just how much the room had changed. Her exact words were "there is no echo in here". The Audimute panels had just passed the second test. I had turned my space into a "dead zone", and it is noticable. It is almost like your ears are popping or something like that.


The Audimute panels are made in the U.S.A. and they come with a 100 percent guarantee. They, however, will not improve the sonic frequencies in your room, but they will prevent a lot of "audio spillage" from entering your room, and more importantly, entering your microphones!


 The window in my space is still bare, and I have more material left. I will be trying to solve that issue too. I hate to block the light from entering into the space, but the window is a source of noise. That is, noise enters through that wall.

 I will keep you posted on this, and what I happen to come up with. What about you? Have any of you had to isolate a room with windows? If so, what did you do? Please, let me know, and I will pass that information on, right here on the blog!


As taken from the press release.......

StrumSchool.com, a free web-based service that uses a curriculum of instructional videos, downloadable documents and a dash of personal attention to teach aspiring musicians how to play the guitar, has announced its beta launch.

StrumSchool's service is geared towards teaching beginners basic guitar fundamentals. The site uses an easy-to-follow curriculum of instructional videos, downloadable lesson plans and personal attention from professional teachers to help its students learn how to play any genre of music.


StrumSchool was designed to teach aspiring musicians how to play the guitar at their own pace and on their schedules. Irregardless of how much previous experience its users may or may not have, StrumSchool  focuses on making the process of learning basic guitar fundamentals easy and free.


Sunday, April 22, 2012

Using Expanders in audio

 
I was talking with a very good friend of mine, recently, about posting topics for the Home Recording Weekly blog. I expressed that I have been tossing around the idea of writing a "series of posts" covering some of the basic tools of our trade. He liked the idea, and he agreed with the idea, and then added to it by saying "Content is king". Simply put, and yet right on the mark. Content is king indeed. Not only have I decided to write this series of posts, but I have decided to start with a tool known as the expander.


Expanders..... What are they, and how do we use them in our audio? These are some great questions, and I really hadn't used one before too long ago. Recently, I was using a different "audio tool" in place of an expander, and the results were less than stellar. Since then I have fallen in love with Expanders, and need to share what I have learned.

Let me detail what it is that expanders do, and then I will tell you what I was using in its' place.

Expanders are a tool that we can use in out tracks to help clean up audio. Expanders can be set, much like a compressor, to "work" or "turn on" once a threshold has been crossed. Compressors do not operate until a threshold has been crossed, and once they turn on they reduce the output or reduce the signals output. However, unlike a compressor, once the desired threshold is crossed in an expander, the expander then acts more like a switch. Once the threshold is crossed, the expander "opens" and allows audio to pass through untouched.

You might be thinking about noise gates right about now, and asking yourself why I didn't use a noise gate as a comparison in this post, you know, instead of a compressor. Expanders can be thought of as a noise gate, but they do operate differently than noise gates. There are some important features that expanders have that most noise gates do not have. For example, expanders will not only allow a threshold to be set, but you can adjust the range, attack, release, and most importantly, "the hold".
Most of the noise gates that I have used in the past, are either "on or off", or "allowing audio to pass or not allowing a signal to pass". There are no settings like "the hold" feature found on an expander.


 So, what is "the hold" feature? The hold feature tells the expander how slowly, or how quickly, to toss the switch once the threshold is released, or shut off. This can act like a simple fade, so that the switching on and off does not stand out. The "hard" clicking on and off of audio can be noticed. That is the reason noise gates can often times be "heard" when used, and expanders can not be "heard" or audible. That is why I decided to use compressors as a reference, and not a noise gate.

Let me explain how I have been using an expander lately, and why a noise gate would not work in this particular case.

I have been mixing a rather popular, and new podcast. This has proven to be a blast, and I look forward to each new episode that I am handed. As usual, I had some interviews that needed to be mixed in with the podcast. The interviews are actual conversations via Skype, with each person using headsets, and recorded using Audacity. These interviews come to me on two mono tracks, with one speaker on each track. So, as one speaker stops talking, the other speaker starts talking. In between the talking there is a lot of noise, like interference and electronic jittering. I almost started to remove this noisy, dead space in between the speaking parts by simply deleting it, and then use fades to bring the speaking parts in and out. This would have taken a very long time, and been rather tedious. So, I decided to "drop" an expander on each of the two mono tracks, and see just how well I could do at removing this noise. You will need to watch the video to see how I set it up, but let me just say that it worked like a charm.


The important thing that I hope you retain, here, is that I saved myself a lot of time and frustration by using an expander. Since this mixing gig is a paying job, the less time I spend editing, the more money I make. Well, when figured out using the "paid by the hour" formula anyway. Truth be told, I make a set fee with each episode that I mix. So, in this case, time really is money. Plus, I avoided a major headache by not having to delete a ton of track, and then add fades all over the place. Yet another thing thing that I want you to remember here is that a noise gate (most likely) would not have worked as well, if at all, in this particular situation. Why not? Great question. Let me answer that one.


Without the "hold" feature found on expanders, the "switch" that allows audio to pass through would either be "on, or off". This hard switching on and off is not only audible to the listener, it can become very annoying! Most people would not want to listen to the interview, let alone the podcast, and that would be bad news for me! A noise gate has its' place in audio, and can be wonderful for a lot of things, but an expander is just way better for this particular application.

Once more, I wish to just say "Thank you for stopping by the Home Recording Weekly blog". You are the reason I blog, and You mean everything to me! Let me know about anything you might want to see here, and I will do my best to make it happen. Please just drop your email in the little box up at the top of this blog, and to the right, just so you can get Home Recording Weekly as email. This way you will never miss a post. You should find Home Recording Weekly on FaceBook, by following the link, and "Like" it. I like to know who my readers and followers, and a simple "Like" allows me to see you. I am also on Google+, and if you are too, follow the link and let me know you are out there. Thanks for all of your support, and until next post, "Have fun and be kind to one another!

Friday, April 6, 2012

Audiofile Engineering apps that I love, and use a lot!

Audiofile Engineering has some very cool apps for iOS devices. I demo'd their "Quiztones" app on Home Recording Weekly some time ago, and that was cool all by itself. They are cool because they are very simple to use, elegantly laid out, and made for capturing sound! I highly recommend that you look into purchasing these two apps. Why? Here are the two main reasons I will give you to head over and get them. One; because I use them often and have fallen in love with the ease of use when capturing sounds. Two; the easy to use editing functions found within!

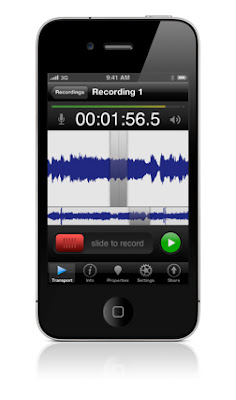
First of all, there is the FiRe 2 field recorder for recording sounds into your iOS device. It is a fast way to record sound, when you want to, and where ever you are. Not only will the FiRe 2 field recorder record sounds, but it allows for some editing too! Here is some information and specs, as taken from the Audiofile Engineering website.

"FiRe2 will again revolutionize what you expect from a portable recording application. FiRe was the first iPhone recorder to display an accurate audio waveform in real time, the first to support markers, Broadcast WAVE metadata, and the instant downloading of files in multiple file formats. FiRe was the first application on any platform to offer native SoundCloud integration. Now FiRe 2 incorporates into its original elegant design a stunning list of powerful
new features including":


- Advanced editing suite with SmartEdits, Bezier fades, change gain, normalize, looping playback, regions and more

- Improved Transport screen with faster and smoother drawing and larger waveform view

- EQ and Dynamics effects by Audiofile Engineering

- iTunes File Sharing

- Enhanced input processing powered by iZotope™

- Record in background
Dropbox integration
- Regions
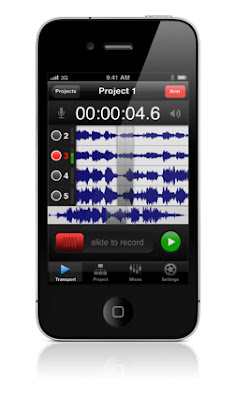
FiRe Studio is the second app that I wish to tell you about. This is like FiRe 2, but with 8 tracks to record onto, and a robust multi-track mixer! Here is some information taken from the Audiofile Engineering website.
"FiRe Studio was created for audio professionals by audio professionals. It's powerful enough for the most experienced musicians and recording engineers, and its efficient workflow and intuitive interface makes it a breeze for business and casual use.

FiRe Studio is built exclusively for iPhone and iPod touch and is brought to you by the minds at Audiofile Engineering. Combining powerful, elegant and uncluttered audio utilities with unparalleled technical support, Audiofile Engineering is one of the most innovative and experienced audio software developers for OS X and the iOS. "

- Editable Markers and Regions

- Detailed Mixer (rotate to landscape view in a mix)

- Click track

- Unlimited number of mixes

- Configurable track colors

- File export via iTunes File Sharing & FTP

- SoundCloud

- Dropbox integration

These are two great apps, and I love them both. But how do I use the FiRe2 and the FiRe Studio? Well, this is just an example, but true none the less. I sing my five month old son to sleep most nights. This is fun for me, but I had an idea. What if I could sing to him, with a backing, multiple track? So, I opened up FiRe Studio and laid down six tracks of the "sleepy time song". Now, oftentimes, I will pull out my IPhone, open

FiRe Studio
, find the "Sleepy time song", and press play. I don't do this all the time, but it is something that makes my life a little more high tech-like! Thanks to Audiofile Engineering for making such cool apps for the recording nuts in us all!

Thursday, April 5, 2012

Figure by Propellerhead

Let me tell you right now that Figure is not Reason or Record. So, what is Figure? The most fun you will have for a buck!

Since downloading Figure I have been pasted to my IPhone. My neck is getting sore from bobbing my head to the beats that I have been creating.

Figure looks like no other app out there. The colors are rather pastel, and the interface is simple. It just looks like the folks over at Propellerheads have used their design muscle once more. You have seen what is possible, with the Balance unit, why did we think that Figure would be any different?

Figure acts like no other app out there. The speed and simplicity is king. With just one finger you can get some rather dope beats, bass, and leads going, and then save them for later.

Figure
is not a DAW, nor a workstation, but simply a music making app meant to help us all pass some time, and look and act very good along the way.

Here is a snippet from the Propellerheads website ......

"When we set out to create Figure we knew an amazing sound was crucial to its function and simple enjoyment. Fortunately, we didn’t have to look far to find amazing sounds. Powered by Reason, our flagship desktop music production software, Figure puts our advanced Thor Polysonic Synthesizer and Kong Drum Designer in your pocket.

Playing bass, drums, and lead melodies on Figure all happens through the performance pads. These have been designed for touch control from the beginning. You can tap them like traditional keyboards or pad controllers or you can simply hold your finger down and let the rhythm wheels provide a pattern for you. You can easily tap into the sound-sculpting power of Thor’s filters, envelopes, and effects by adjusting each preset’s “Tweaks”.


Don’t know what a filter or envelope is? No problem! Just move your finger along the same performance pad and listen to the changes in sound."

Figure consists of many different drum kits, bass samples, and lead samples to write with. You choose the BPM, the instruments, and the key of your song too, and then get to playing! With one finger you can tweak all sorts of parameters, with options such as envolopes and delays.

There are diferent "screens" to play with, with titles like "Pattern, Tweaks, Song, Mix, and System". While on the "Pattern" screen, you can choose the samples, the tempo, the range of notes to be plyed, and the number of steps within the selected scale. Here is the breakdown of each "page", and what you can select on each of the pages......

The "Tweaks" page, allows for tweaking with effects like filters and delays and the like. You choose the instrument to alter, and then get that finger ready!

The "Song" page is where you select a musical key, and the tempo that you wish to work in.

The "Mix" page is just as you might think, a three channel mixer. You will also find a dial or slider marked "pump", and that is customizable too.

Lastly, the "System" page is where you can clear your new creation and find the online manual if needed.


Figure
is simple, elegant, and well designed. It is fun to play with, and the sounds are wonderful.

Figure
is powerful, and addictive too. With a price of only one dollar, what are you waiting for? Go and get this cool new app!

Sunday, April 1, 2012

Mobile Keys 49 from Line6


Line6 has been in the music product business for some time now, and has been making some big noise the entire time. With amp and effect modeling devices like the Pod series being their bread and butter, it is nice to see new products coming forth. Products like the new Stage Scape M20d, and their amp line have been very successful, and well received.


The Mobile Keys 25 and the Mobile Keys 49 are the newest offering from the very innovative Line6. Why do we need a mobile keyboard at all? Well, here is just one reason....


There have been many a night where I hurry to get home. I was trying to avoid loosing the song hook that I was playing over and over in my head. After one last stoplight, I sigh, as I know that it has been too long, as that idea is just about gone forever. If only I had a way of recording that hook right there, on the side of the road, on the bus, or where ever you find yourself.....


The Mobile Keys 25, and 49, were made for just one reason, and one reason only.


Mobile devices! The Mobile Keys 25 and Mobile Keys 49 work awesome with your IPad, IPod touch, and the IPhone! Your IOS device of choice actually powers the unit once you plug in the Mobile Keys, and then you are ready to start rocking! This is "plug and play" at its' simplest form! Included in the Mobile Keys package is a cable for plugging in your device to your IOS device, a "midi shortcut" sticker, and a manual. The sticker is more a keyboard shortcut type, and is to be applied to the Mobile Keys for making midi changes.


The Mobile Keys 49 is the unit that I am reviewing today.


First, let me start with the Mobile Keys 49 controller itself. This unit feels nice in my hands. There are two rubber coated "velocity wheels" to the far left of the unit, with one for altering pitch on the fly, and one for grooving out with modulation effects. There are only two knobs for us to twist, both coated with a nice "gripping" rubber. One of these two knobs is for volume level, and the other one is for left/right panning. There are three rubber coated buttons/pads on the unit too. The first one is labeled "shift", and this is for editing the midi commands. The other two buttons/pads are for changing the octaves up or down. I wont get into the midi editing features here, just know that you can change things like send and receive channels and other global data. Every button works well, and feels very nice in my fingers. A simple and elegant design. Well done Line6!


The touch sensitivity of the Mobile Keys 49 is very good. The 49 keys are full size, ahh um well, as far as this guitar player can tell anyway. When compared to my full size midi keyboard (which is for the home and not mobile at all), the key sizes look like a perfect match. However, only one will ever be able to leave the home!


The Mobile Keys 49!The Mobile Keys 49 units are perfect for writing while on the daily commute to and from work, perhaps while lounging on a couch, or while messing around with in bed. Where ever you might find yourself capturing ideas is where the Mobile Keys comes in handy! Writing hooks is what we all do. Getting them down when and where they happen is the name of the game for the Mobile Keys 49.


It is true that the Mobile Keys 25 unit is far more mobile than the Mobile Keys 49, but I am a "two hander" type of player by nature. I dislike writing and playing with one hand, and choosing octaves with the other. That very reason is why I like the larger of the two units. Although, you will need to select octaves, with either of the mobile keys devices, but the Mobile Keys 49 is "almost" twice as big. You probably knew that, so please ignore my poor attempt at humor.


Both the Mobile Keys 25 and the Mobile Keys 49 perform perfectly well, feel great, and "reek of portability". I decided to use the Mobile Keys 49 with the free "50in1 Piano app", and it was complete and total "plug and play". A perfect match. I was making music, sweet portable music, in seconds flat. This made me warm inside, as I knew that I might never forget another hook for as long as I may live.


Thanks for visiting the Home Recording Weekly blog, and please do yourself the favor and subscribe right now. This way these demos show up right in your email! Feel free to drop me any questions, comments, or concerns, via email or here on the blog. Remember to like me on FaceBook for a refreshing wave of cool news and the like. I am also on Google+, and I hope to see you there as well. Rock on, and get portable with Mobile Keys.


Sunday, March 18, 2012

EZKeys Grand Piano from Toontrack!

What a complete joy EZKeys Grand Piano is to work with! When was the last time that you heard someone say that about a plug in?

I have found the new midi piano writing tool for all of the music that I will write from now on! EZKeys from Toontrack! I actually found myself letting everyone that I came in contact with know that I have found the best midi piano plug in ever. I have never done that before either.

I can't believe how good EZKeys sounds! Top that off with an amazingly fast workflow, and the ease of tuning the included midi files to music that you have already recorded, and a true winner is born. Truth is, that within 30 minutes, I had found the perfect midi files for a new theme song, for my new podcast that is in the works. I easily cut, copied, and pasted the midi files to taste, in minutes flat, to better fit within my tracks. Then, with a super fast chord change here and there, my work was done! I love that! I used to spend hours upon hours writting midi for piano.


>

The EZKeys interface is so darn simple to use. Each genre of included midi files has several choices for each of the parts of a song (intro, verse, chorus, ect.) All you need to do is audition them, and then, as you find that perfect midi file, grab it! Drag and drop the midi file that best suits your tracks into the plug ins midi workflow area. Don't worry if it is in a wrong key, too long, or too short. Listen to what is being played. Why? Because you can simply use the provided tools to cut it up, copy and paste the midi parts around, just to get the midi performance perfect. I do that very thing in the video. Once you cut and paste to taste, you simply join the splices to make one long file. Dragging and dropping this "new long midi file (sequence) into your daw is easy, and a song was born. In the past, I often have written my midi in, note by note, but those days might just be over.

EZKeys
is just too darn fast to work with for me to ever go back.

EZKeys works fine as a stand alone instrument too! The sounds are wonderful, and the effects, like reverb, are just amazing. You might want EZKeys just for the stand alone qualities alone! It sounds this good! I am also using my favorite Toontrack plug in for the drums too, in the video, and that is Superior Drummer 2.0. However, EZDrummer is just as good, and it will do almost everything that Superior Drummer 2.0 will, except for the mixing and effects parts of the software.

I can envision some new sample packs and different piano types in the works, but this is not fact. Just one of my dreams for the future. If Toontrack repeats what they have done for EZDrummer and Superior Drummer 2.0, with both midi packs and kit/studio packs, then we are in for a long ride! Lets all pray that the past repeats itself!


Thursday, March 8, 2012

Quiztones Frequency Ear Training

Quiztones Frequency Ear Training for Mac & iOS demo and review!

From the Quiztones website: "Quiztones is a frequency ear trainer for amateur and professional audio engineers, producers, and musicians."

What an awesome tool, and a fantastic idea Quiztones is! If you find yourself mixing, mastering, or just using EQ, you will need to train your ears. Training your ears is fundamental, but how does one get the training? Here is the tool that makes learning fun! First, here is how Quiztones Frequency Ear Training for Mac & iOS works!
Quiztones is broken down into two separate tests. The two tests are called "Tones", and EQ".

The tests that fall under "Tones" play sample frequencies and then supplies you with four answers to choose from. Three of the four answers are close, but only is correct. You only need to pay attention to the sample, and make your guess. I was very impressed the first time through! My score, however, was not as impressive, a 575. But that is the whole point. I need to get better at knowing the spectrum, and this is a fun way to get better! In fact, this was a great, and a fun way to learn how to pay attention to what I was hearing. The 4 answers, supplied for us to choose from, are close to each other, as to be a better challenge. What I mean by this, is that you have to think about what you just heard as you make your choices. There are no giveaways here.

The second test option, "EQ", is where I find myself spending most of my time. This section plays samples of instruments, or entire songs, and then applies a chosen frequency boost or cut to that. You can audition the sample over and over, and you can toggle the "applied EQ" on and off. This makes "Hearing" the applied EQ easier, and choosing less like guess work. Here is a list of what is inside the "EQ" part of the app.....

The "EQ" section of Quiztones has many choices from which to choose from. There are Music Library, Acoustic guitar, Bass, Drums, Electric guitar, Orchestra, Piano, Pink noise, Strings,
Strings 2, and Vocals. All of these instrument selections have sub-categories to select from, such as "Easy +10db", "Hard +6db", and "Hard -10 db". The "db" part is how much (in decibels) or how less of the "EQ" is applied to the samples. The samples are well recorded, and make this app so much more than some sort of game. I am learning here, um, and keeping score!

Choosing the "Music library" selection actually imports audio (that you select) into it, and then
Quiztones adds the frequencies of question to that song. This makes perfect sense too. Wouldn't it be great to hear a particular frequency boost in a piece that we already recognize, forward and backwards, and then decide which frequency range it is? After all, don't we often ad an EQ onto a master buss? This makes sense for the mastering folks out there too.


Head over to the Quiztones website and grab the app for yourself today! It will work on Macs, and Iphone/Ipod touch. For 4.99 U.S.D., my ears are going up in worth each time I play through a "set".

Monday, February 27, 2012

HRW on Facebook!

Hello everyone, I hope all is going well in your studios. This post is simply a little note to let you know a few things.
First, Home Recording Weekly is now on Facebook! Here is my new Facebook page link . Please head over there and send me a friend request. I want to have as many of you on my friend list as I can. This will make give aways so much easier!

Secondly, if any of you wish to reach me directly, with any questions about the blog, I have a new email for you all. Kern@HomeRecordingWeekly.com is the email for that. So, if you have concerns, issues, or ideas for me, please feel free to drop me an email!

Thirdly, I have been so busy raising my newborn son that I have not posted in some time! Please excuse me for my absence! I am the stay at home dad, and all is well, but busy as all get out! Trust me, there are some cool demo video projects in the works, as well as some cool ideas.

Thanks for stopping by today!

Monday, December 19, 2011

A dedicated controller for Reason!


New from Nektar, a “all-in-one” controller for Reason and Record!

Here is the press release, and You could win one for yourself too!

Nektar Technology, Inc. - December 19th, 2011 (ictw) - There have been already a lot of rumors about it, now it is official: Nektar, the California based new brand for Advanced Control * Enhanced Workflow
Controllers
announce Panorama P4, the first dedicated Controller Keyboard for Propellerhead Reason. This couples with a great prize competition. Musicians can win the very first Panorama P4 rolling off the
production line, by submitting their competition entry at
www.nektartech.com.

Panorama P4 is Nektar’s vision of how a great controller keyboard should work. As there are many controllers on the market already, it is still a challenge to find one that offers the feel and flow of
operating the software, as if it’s hardware.
Panorama P4 uses a communication protocol that has been
custom designed for Reason 6, putting control - every control - at the musician’s fingertips. Panorama, in addition, of course also features traditional MIDI controller capabilities, including a MIDI output, so its possible to switch between the virtual and a hardware instrument rack in real-time. Panorama P4 really provides access to all areas.

Panorama P4 will be shown to the public for the first time at the NAMM Show 2012 in Anaheim, January 18th – 21st 2012 at booth #4912.

Now it is possible to win the first ever made Panorama P4.And the rules are simple: Answering the the questions and including one’s real name and email address.The competition will run until NAMM and if more than one submission got all answers right, Nektar will pick the winner through a random draw. As there is one question even Nektar do not know the answer to yet, everybody is invited to make a good
guess.


Panorama is expected to be available in Q1 2012. Price tba.

More Information you can find at: www.nektartech.com

Tuesday, October 4, 2011


Buy Toontrack Music'c latest EZX® expansion, Americana, before the end of October 2011 and automatically enter the competition to win a hand carved, custom designed and one of a kind guitar. On top of that, once you've won - we will have your name or custom inscription carved in the pickguard. How cool and unique is that?


Contest Rules:
• To be eligible to participate, a copy of Americana EZX must be registered to your personal Toontrack account before the end of the month of October 2011.


• Any place of purchase is valid


• Only new copies apply (second hand owners are not eligible to enter)


• One lucky winner will be randomly picked from all copies registered from September 30 through October 31 2011


Follow this link for more information about Toontracks EZX® Americana expansion pack.


Sunday, September 25, 2011

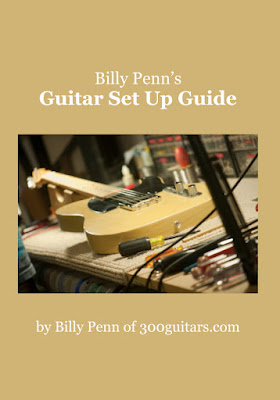
Review of Billy Penns’ “Guitar Set UP Guide” E-Book.


From the creator of the popular 300 Guitars website comes a new E-book that perhaps every guitar player should have.


This is one thick “E-book”. How about 46 pages of knowledge, packed with great images, relevant video links, and so, so much more!


However, before I take you any further, perhaps I should explain both “who is Billy Penn”, and “why it is that we should we take his advice?”.


In Billy’s own words and with paraphrasing too…….


“I began my career as a guitar (and amplifier) tech out of necessity and pure love for the instrument. As far back as I can remember I was always interested in how things worked, came apart and went back together………..


Around the age of 19 I got a job at Kramer Guitars in the stock room which was right next to the repair department. I used to hang out and watch to see how some repairs were performed. As I got older I started playing in bands but my full time day gig was as a Union Electrician. My band mates and their friends would give me their broken guitars and amps and I would fix them. I couldn't decide which I loved more, playing them or fixing them. So I decided that it would be cool to be the best I could be at both……….


I then worked in various music stores doing repair work. I actually created a repair tech job at Outlaw Guitars which specialized in vintage guitars and amps. I got an education of a lifetime there working on all the different prized gear you can think of. I used to stay late and open every amp and guitar to see how they were built and how they all were different. I really got more interested in amps during this time and decided to start a boutique amp company.………


Around this time the playing bug started to gain strength and I found myself touring for part of the 90's and spending a little time in Nashville. Being on the road and in the studio was another great education. This was the other side of the bench as I like to call it. Needless to say I took care of everyone's gear but I didn’t mind at all. So after about 20+ years working on countless guitars and amps (some pedals too) and having my own “Pennalizer” brand of amps I decided to go online with my passion and started 300guitars.com…….I actually have my own band called the Inside Drivers and play gigs regularly and record. I like to keep that aspect of myself “plugged in” so I can constantly learn more music and come up with ideas to better help players with my services.”


Now, back to the review…….


This E-book is geared towards electric and acoustic guitars, but not the types with “floating trems” and locking nuts. There will be another E-book coming soon which will cover these types of guitars.


As a guitar player, band member, songwriter, and over all guitar enthusiast, I have always wondered just which important guitar adjustments I should try to make on my own. With much regret, what I found out was that this information is “trade sensitive”, and that no guitar tech seems willing to just give this knowledge away. My guitars just seem to fall out of perfect setup as the gigs pass, and my guitars never seem to play the same ever again.


Billy Penn makes no bones about giving us the exact and precise information that we all need, and wish to know. Such knowledge is vital to the way that our guitars “play”, feel, sound, tune up, and perhaps most important of all, how long our guitars will last. It is like having a guitar tech with us, for as long as we keep our E-book Guitar setup guide that is.


Within the pages of this E-book, Billy Penn teaches us how to perform the most vital of guitar adjustments. Billy teaches us how to adjust our guitars’ intonation, truss rods, radius, action of the strings, pickups, and all of this with exact precision! The information that I have always tried to obtain is “just what substances should be used to polish all of the different types of guitar finishes”. Well, that is also in this excellent guide E-book!


Billy lists the best possible tools that we should have available before we begin our guitar work. He details what the work space should look like, what it should contain, and as we read along he details lot of great tips. Great tips that we can all use to make our job a lot easier.


All of the fine measurements are in this E-book, along with a lot of images, video links, and knowledge that most “techs” do not like to give away. Thanks Billy Penn, for helping all of us guitar players! At $4.99 this is a steal, and a must have!